- Generate a working humanoid rig with Rigify and bind a mesh to it.
- Weight paint a shoulder or hip so it deforms instead of crumpling.
- Explain what a weight is — and therefore why crumpling happens.
- Name the four properties Unreal requires of a skeleton, and check each one before exporting.
This course does not require you to build a character — there is no MetaHuman work here, and Projects 1 through 3 are environments. But two things later in the term lean on it: Week 12, where you put hands and a body into VR and find out how much presence depends on how a body deforms, and the final, if you take the immersive-world or snowglobe route and want something alive in it.
If your final is purely environmental, Days 3 and 4 are optional. Day 5 is not — the export pipeline applies to every asset you make, character or otherwise.
Brief · 15 min What a rig actually is
A rig is two things that people usually conflate: a skeleton, which is a hierarchy of bones, and a binding, which is the answer to the question "when this bone moves, which vertices come with it, and how much?"
The second part is where all the difficulty lives. Every vertex in your mesh carries a set of weights — one number per nearby bone, between 0 and 1, and they sum to 1 across all the bones influencing that vertex. A vertex with weight 1.0 on the upper arm follows the upper arm exactly. A vertex on the shoulder seam might sit at 0.5 upper arm and 0.5 chest, so it moves halfway between them and the surface bends smoothly.
When a shoulder crumples into an ugly pinch as you raise the arm, the geometry is not broken and the bones are not wrong. The weights in that region are simply distributed badly — too abrupt a handoff from one bone to the next. Knowing that is what turns weight painting from guesswork into a fix.
Build · 45 min Metarig to bound mesh
- Turn Rigify on
Edit → Preferences → Add-ons, search Rigify, tick it. It ships with Blender but is off by default, which means it does not appear in any menu until you enable it — a genuinely confusing five minutes if nobody tells you.

Edit → Preferences → Add-ons, search rig, tick Rigify. Until you do, nothing about Rigify appears anywhere. - Add the metarig and fit it to your mesh
Add → Armature → Human (Meta-Rig), then enter Edit mode (Tab — Day 0’s key, and it works on armatures too) and move each bone so it sits where that bone would sit inside the body. Elbows at the elbow, knees at the knee, the spine actually inside the torso.
Can’t find it? It is not lost — look in the Outliner: metarig is listed there. In the viewport it is hiding inside your mesh: with the metarig selected, open the green Armature Data tab and under Viewport Display tick In Front — the bones now draw through the body, and stay visible while you fit them. It also appears at the 3D cursor, at human height — so if your model is far away, much bigger, or much smaller, move and scale the metarig in Object mode to match, then Ctrl+A → All Transforms, Day 1’s habit, before you fit a single bone.
This step is the job. It is unglamorous and it takes most of your time, and a badly fitted metarig cannot be rescued afterwards — you will spend an hour weight painting around a problem that was five minutes of bone placement. Work from the front and side views, and check the joints from both.
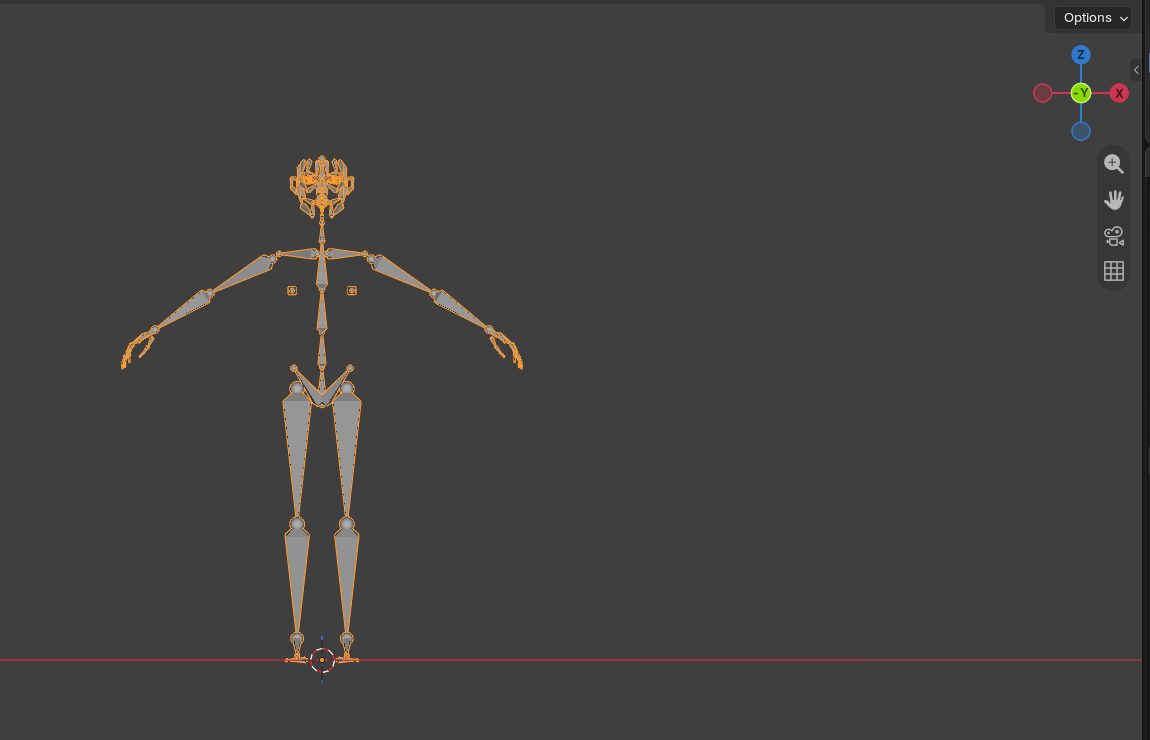
Add → Armature → Human (Meta-Rig), seen from the front in orthographic view (Numpad 1, Numpad 5). 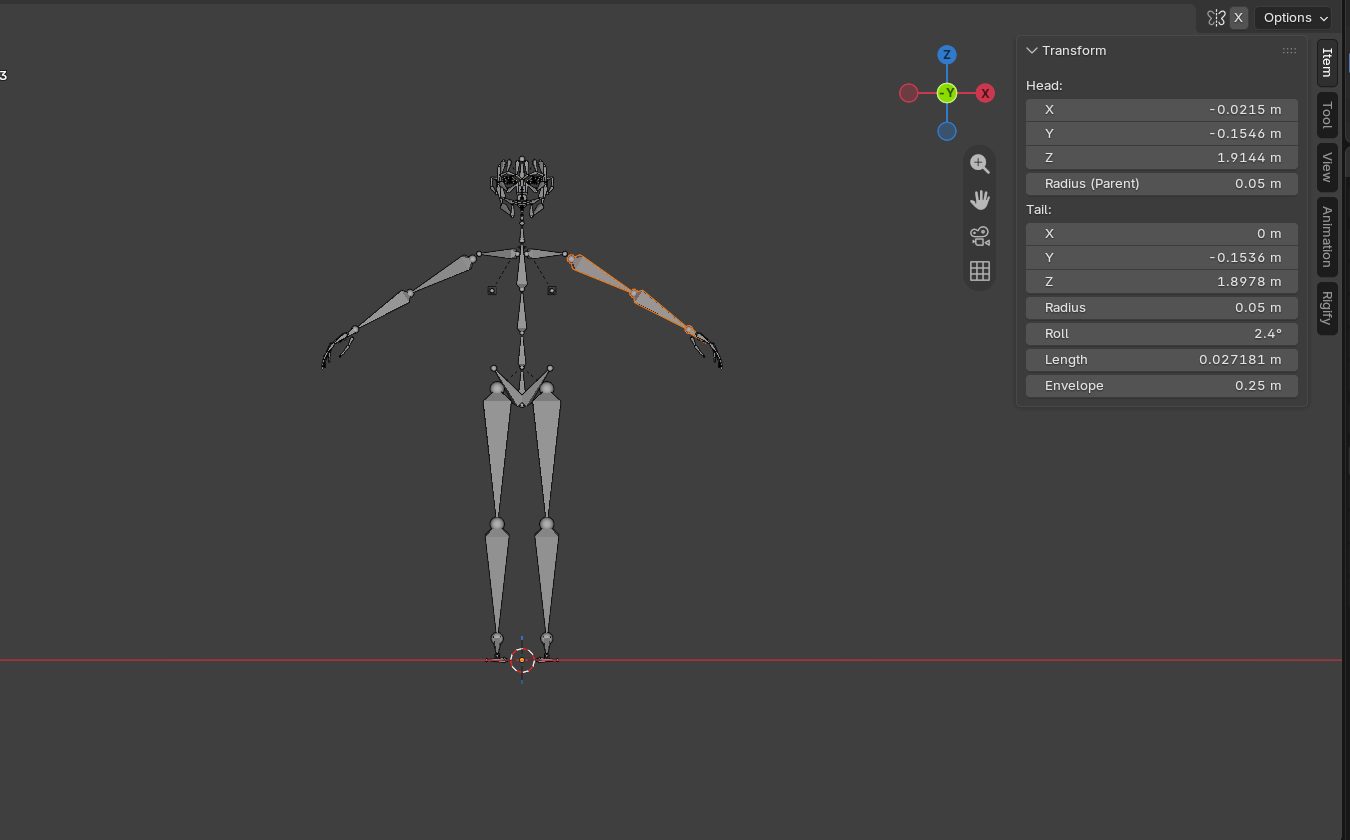
In Edit mode, bones select and move like vertices. The N panel shows the selected bone's Head and Tail — the two ends you drag to the elbow and the wrist. - Generate the rig
With the metarig selected, go to the Armature Data tab (the green stick figure) and in the Rigify panel hit Generate Rig. Rigify builds a full control rig from your metarig: IK/FK switching, control shapes, the works. Keep the metarig — if you need to change proportions later, you fix the metarig and regenerate.
The panel also shows a note — This metarig uses the old face rig — with an Upgrade Face Rig button stacked above Generate Rig. Ignore both. They concern facial animation, which this course never touches, and Generate Rig works as-is. Generation takes a few seconds — Blender has not frozen.
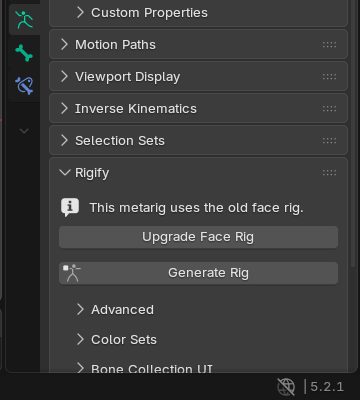
With the metarig selected, the Armature Data tab (green stick figure) has a Rigify panel. Generate Rig is the button. 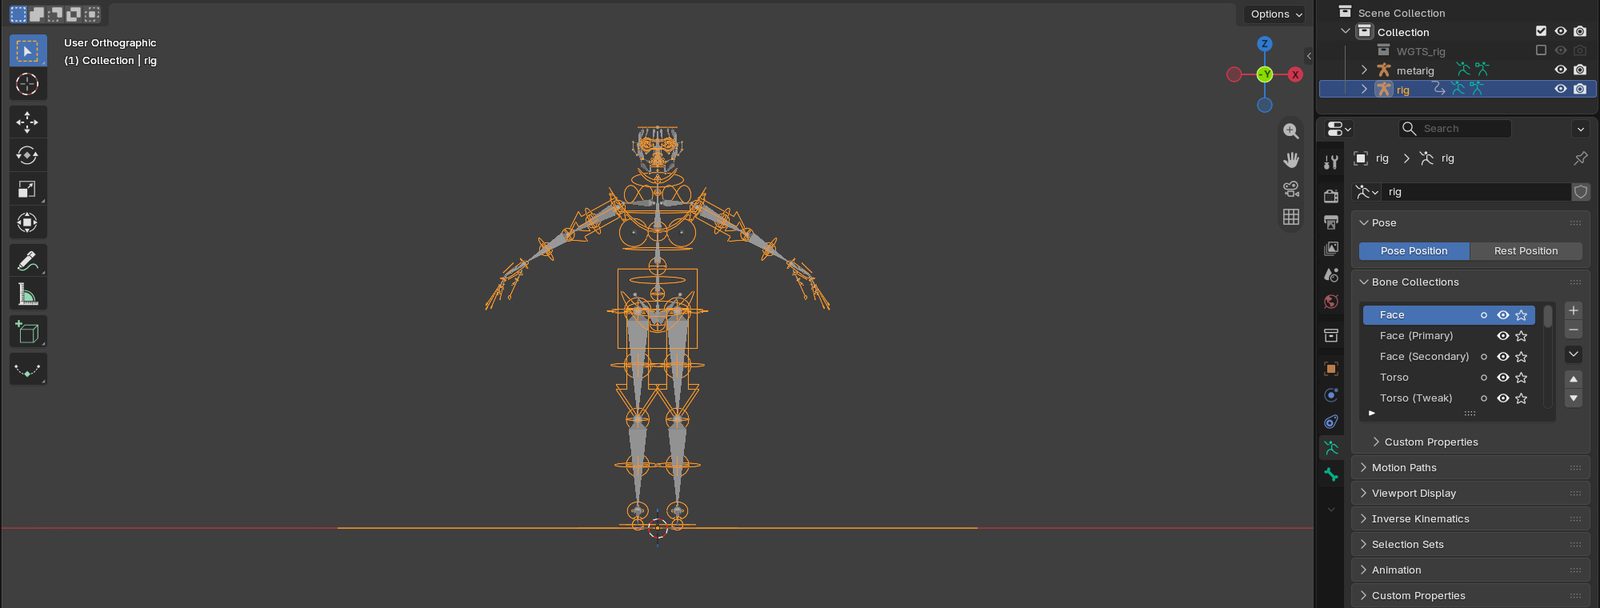
The generated rig: a new object called rig, with control shapes for every limb. The metarig stays in the Outliner; keep it. - Bind the mesh
Select the mesh, shift-select the generated rig, then Ctrl+P → With Automatic Weights. Blender makes a reasonable first guess based on proximity. It is a first guess, not an answer.
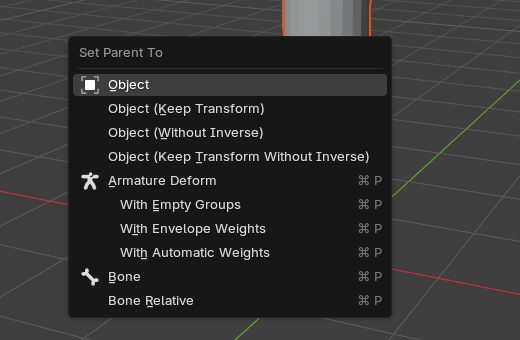
Select the mesh, then Shift-click the rig, then Ctrl+P. Armature Deform → With Automatic Weights. - Weight paint the joints that fail
Getting in: this step alternates between two modes, both on the mode dropdown you used for Sculpt mode on Day 2. Select the rig and switch to Pose Mode — the bones become control shapes you can click, and the same G and R from Day 0 now move and rotate them. Pose the arm up, the leg forward, the spine twisted, and look for pinching.
Then, to paint: click the rig, Shift-click the mesh, and switch to Weight Paint mode — that order matters. Enter it from the mesh alone and the bones are not selectable; enter it rig-first and you can Ctrl-click any bone to see that bone’s weights painted across the surface, with the pose held so the pinch stays visible while you fix it. Smooth the transitions where the surface collapses. Shoulders and hips are where this always goes wrong, because they have the largest range of motion and the most bones competing for the same vertices.
Also hunt for stray influences — a single vertex somewhere in the mesh accidentally weighted to a distant bone, producing one spike that shoots across the model when that bone moves. They are easy to fix and maddening to find later.
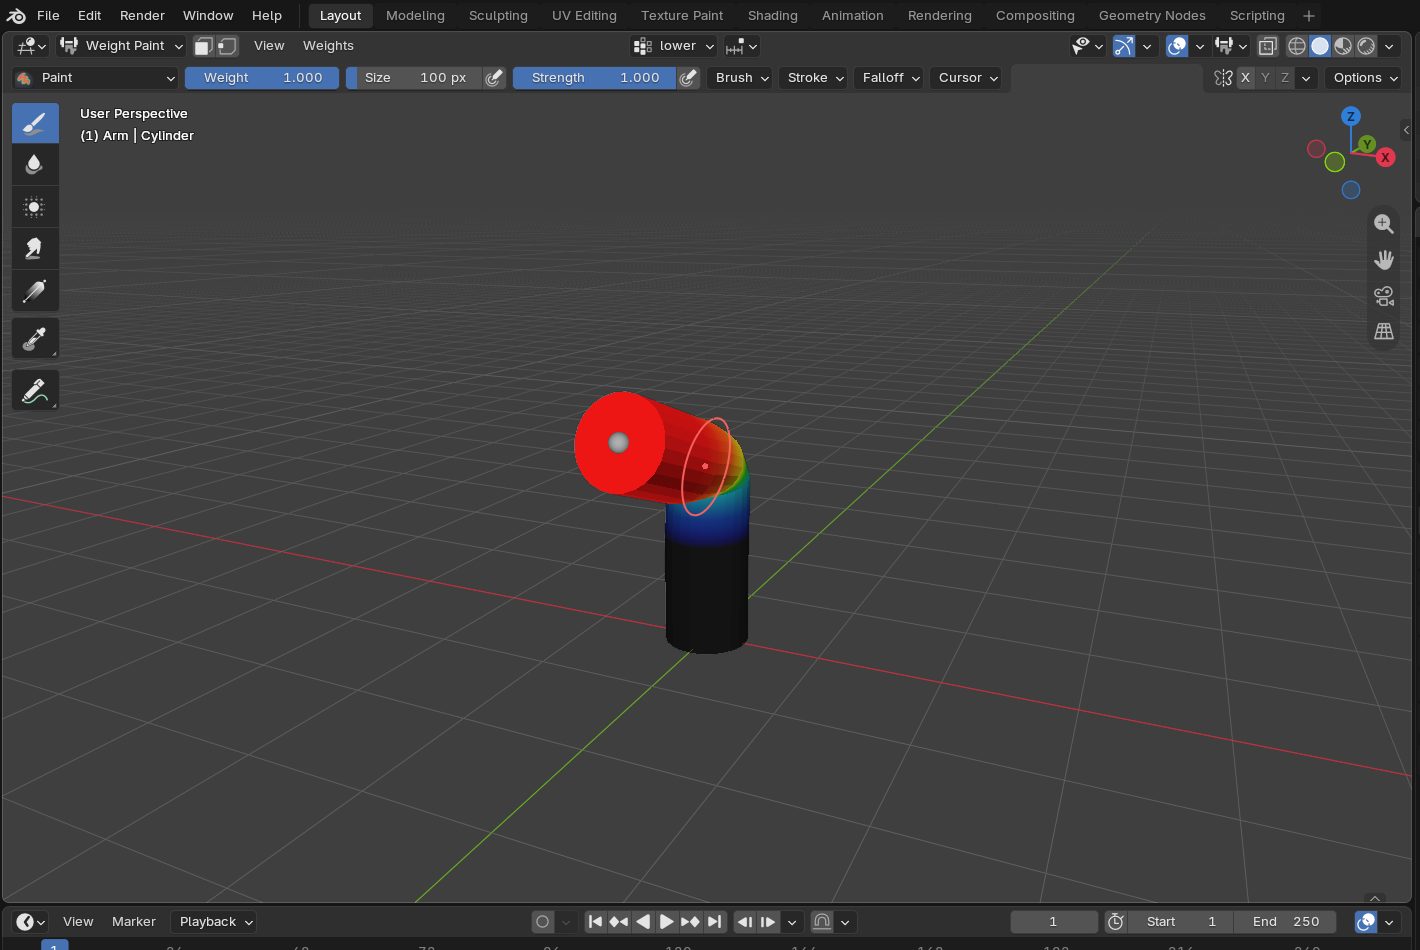
Weight Paint mode on a two-bone test cylinder, with the upper bone bent 70°. Red is weight 1 (fully follows the selected bone), blue is 0. The smooth gradient across the joint is what a good bind looks like; a hard edge is a crumple.
Check · the four rules What Unreal requires
A rig can be flawless in Blender and still import as a mess. These four are the reasons, and every one of them is checkable in under a minute before you export.
- A root bone, named root, at the origin
Top of the hierarchy, sitting at 0,0,0, and separate from the pelvis — not the pelvis renamed. This bone is what root motion drives. Without it, a character that should stride forward will instead run in place while the collision capsule slides off without them.
- Deform bones only
Rigify generates control bones (the shapes you grab) as well as DEF- bones (the ones that actually move geometry). Unreal wants the second kind. Export everything and you get a skeleton stuffed with dozens of junk bones, which makes retargeting miserable and animation blueprints hard to read.
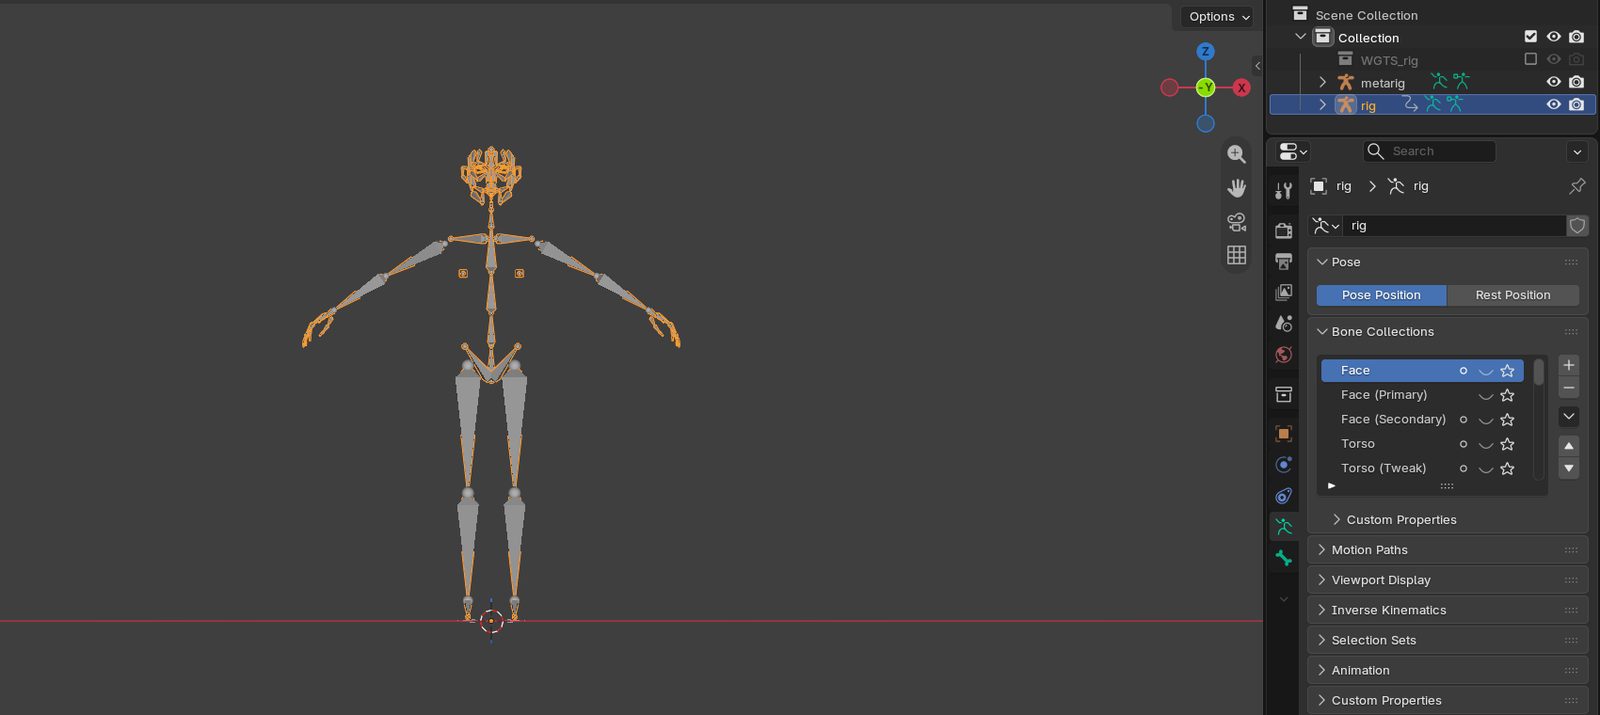
The same rig with only its DEF bone collection visible (Armature Data tab → Bone Collections). These are the bones Unreal wants. Everything else — ORG, MCH, the IK and FK controls — is for animating in Blender, not for export. - Applied transforms on the armature
Day 1, again, and this is where it matters most. Unapplied scale on an armature produces animation that is correct in Blender and wrong in Unreal, with no visible cause. If you check one thing before exporting a character, check this.
- .L and .R suffixes, intact
Blender's mirroring and pose-flipping work entirely by bone name. Rename upper_arm.L to something tidier and mirroring stops working — silently, with no error, which is how you lose twenty minutes wondering why paste-flipped is doing nothing.
Before moving on, explain out loud — to a person, a phone recording, or the wall — what a weight is, and why a shoulder crumples when the weights are wrong. If the explanation comes out vague, that is the part to reread. Everything on Day 4 assumes the rig underneath it deforms properly.
- Rigify is enabled, and the metarig is genuinely fitted rather than roughly nearby.
- The mesh is bound, and the shoulder and hip survive a full range of motion without pinching.
- There is a root bone at the origin, separate from the pelvis.
- Transforms are applied on the armature, and the .L / .R names are untouched.