- Build a MetaHuman in the editor and drop it into the project.
- Explain the difference between bones and controls, and move a character with Control Rig.
- Retarget the Third Person animations onto a new skeleton with IK Rig and IK Retargeter.
- Import a Blender character so it arrives on its own skeleton at the right size.
Brief · 5 min Three roads to a rigged character
| Road | Tools | Time | Best for |
|---|---|---|---|
| Build a human in editor | MetaHuman Creator (in the engine since 5.6), Mesh to MetaHuman | 15 min | Seeing what "rigged" means with zero modelling |
| Import a custom model | Blender with Rigify or Auto-Rig Pro, FBX export, IK Rig and IK Retargeter | 20 min | Anyone who already sculpts or models |
| Buy or download | Fab marketplace, Mixamo | 5 min | Enemies, crowds, placeholder soldiers |
Build · 15 min A MetaHuman, then its rig
- Build the character
Open MetaHuman Creator from the Content Browser. Pick a preset body, change the face, hair and clothing, then click Assemble to drop it into the project.
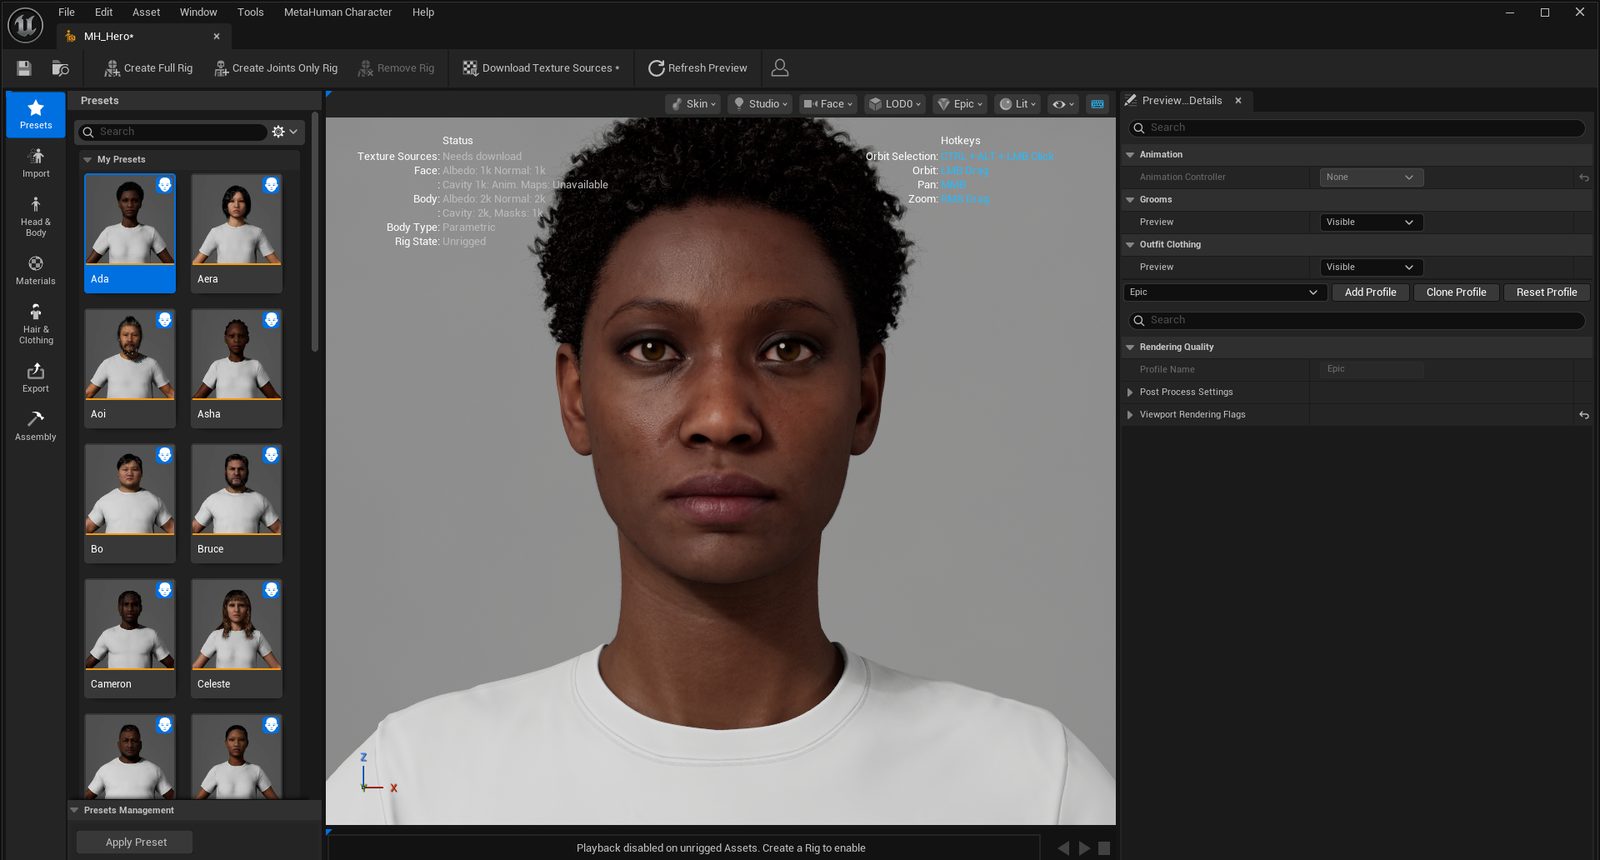
MetaHuman Creator inside the editor: the Presets panel on the left, the Ada preset applied. If the viewport shows a red core-data warning, install MetaHuman Creator Core Data from the Epic Games Launcher first. - Look at the skeleton
Open the skeletal mesh and expand the bone hierarchy. Ask yourself: what happens if the knee bone did not exist? That question is the whole point of rigging.
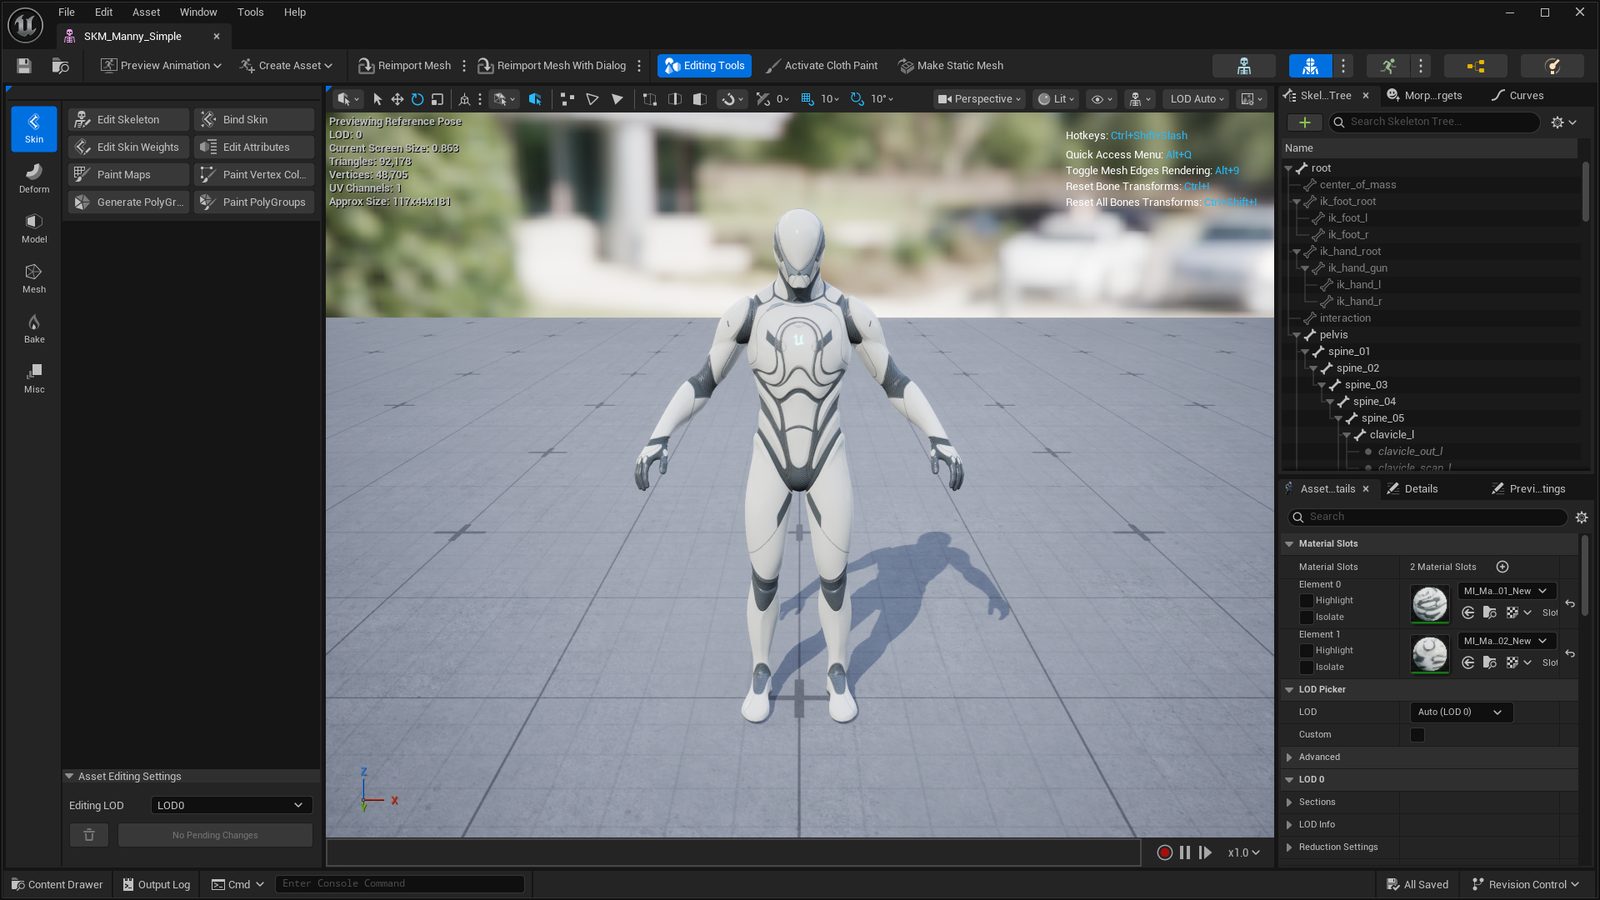
The Skeletal Mesh editor on SKM_Manny_Simple. The Skeleton Tree on the right is the bone hierarchy; expand pelvis to walk down the spine. - Move a control
Open the character's Control Rig asset. Grab the hand control and drag it so the arm follows. Controls are the puppet strings; bones are the puppet.
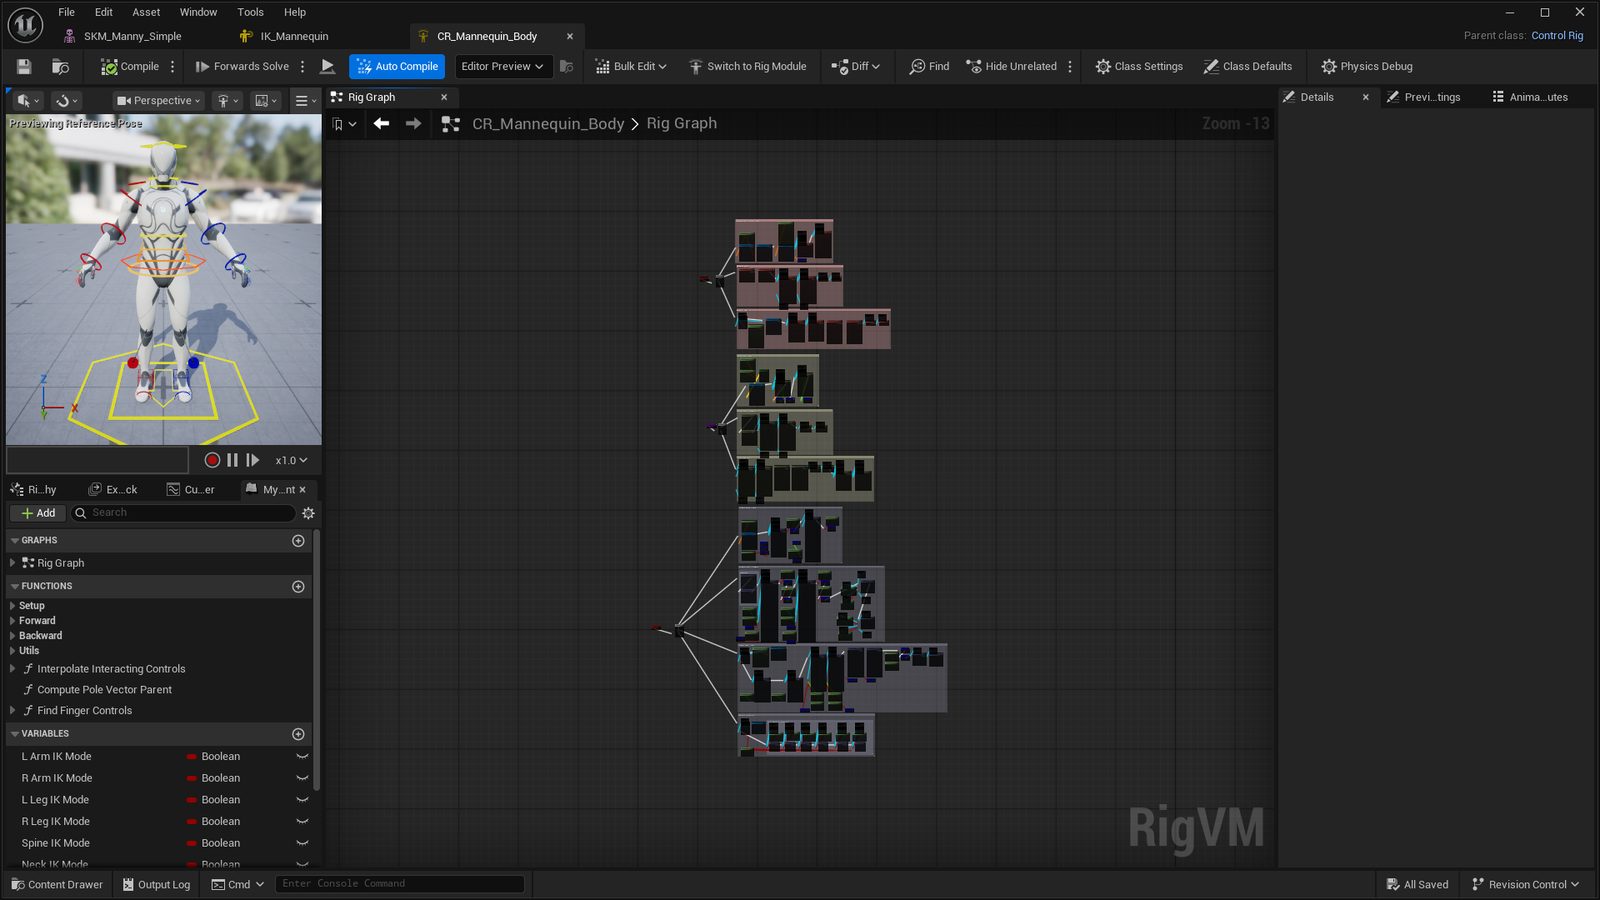
The Control Rig editor on CR_Mannequin_Body. The coloured shapes around the mannequin are the controls; drag the hand ring and the whole arm follows. - Build a rig from parts
Create a Control Rig from the Mannequin instead, choosing Modular Rig. Drag the Spine, Arm and Leg modules onto the skeleton. A working rig from parts takes about two minutes.
- Retarget the animations
Right-click one of the Third Person animations, such as MM_Idle, and choose Retarget Animations (in 5.8 the entry is on animations, not on the skeletal mesh). Pick Manny as the source, your MetaHuman as the target, select the animations, and export. The new character now runs and jumps with no hand animation.
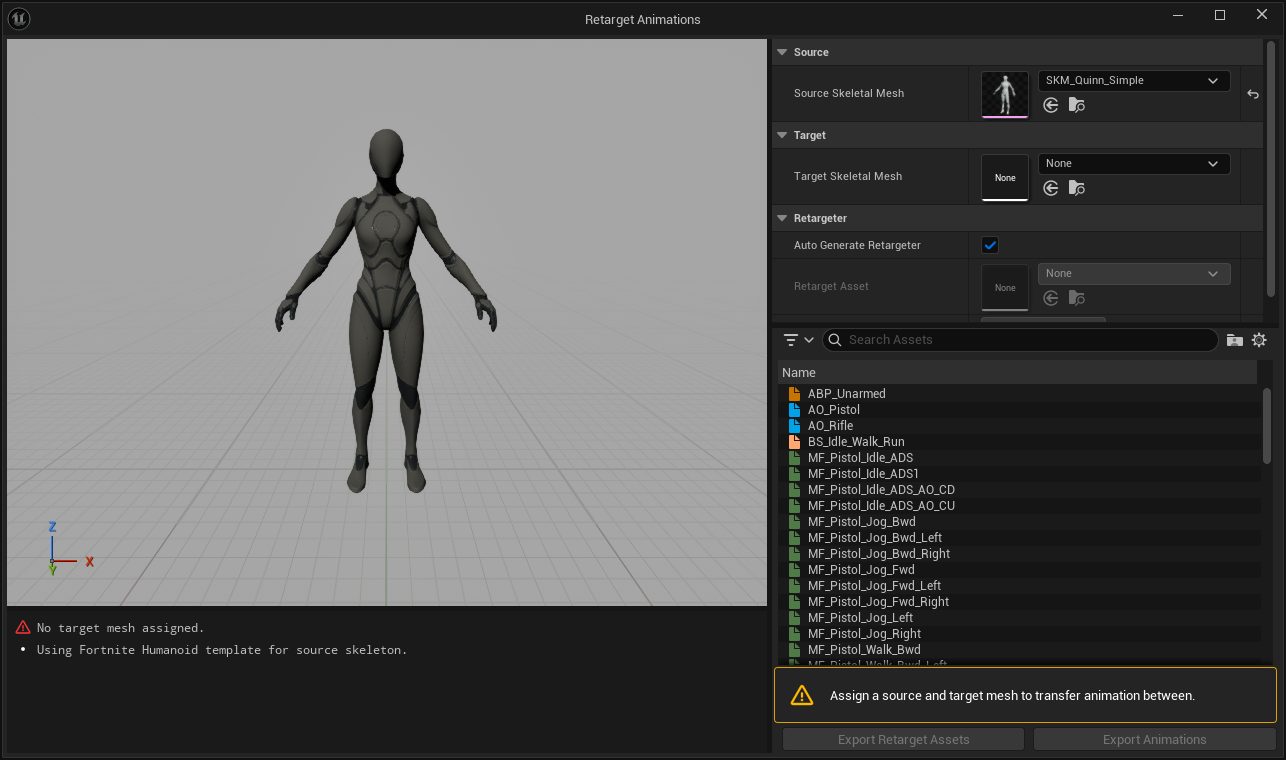
The Retarget Animations window. In 5.8 it opens from the right-click menu of an animation such as MM_Idle rather than the mesh. Pick the source and target meshes here, then export. - Play it
Replace the mesh in the Third Person character blueprint, set the new animation blueprint, and press Play.
Build · 15 min Importing a Blender character
This is the road you already know from the Blender days. The new part is IK Rig, which lets Manny's animations land on a skeleton with different bone names.
- Export from Blender
Rig with Rigify or a plain armature, apply all transforms, scale at 1 unit = 1 cm, and export FBX with Only Deform Bones on and Leaf Bones off.
- Import on a new skeleton
Import into Unreal with Skeletal Mesh and Import Animations on and no skeleton selected, so Unreal creates one for this character.
- Make an IK Rig
Create an IK Rig for the new skeleton. Define retarget chains for spine, head, each arm and each leg, then set the retarget root to the pelvis. Unreal 5.4 and later guesses the chains with Auto Create Chains.
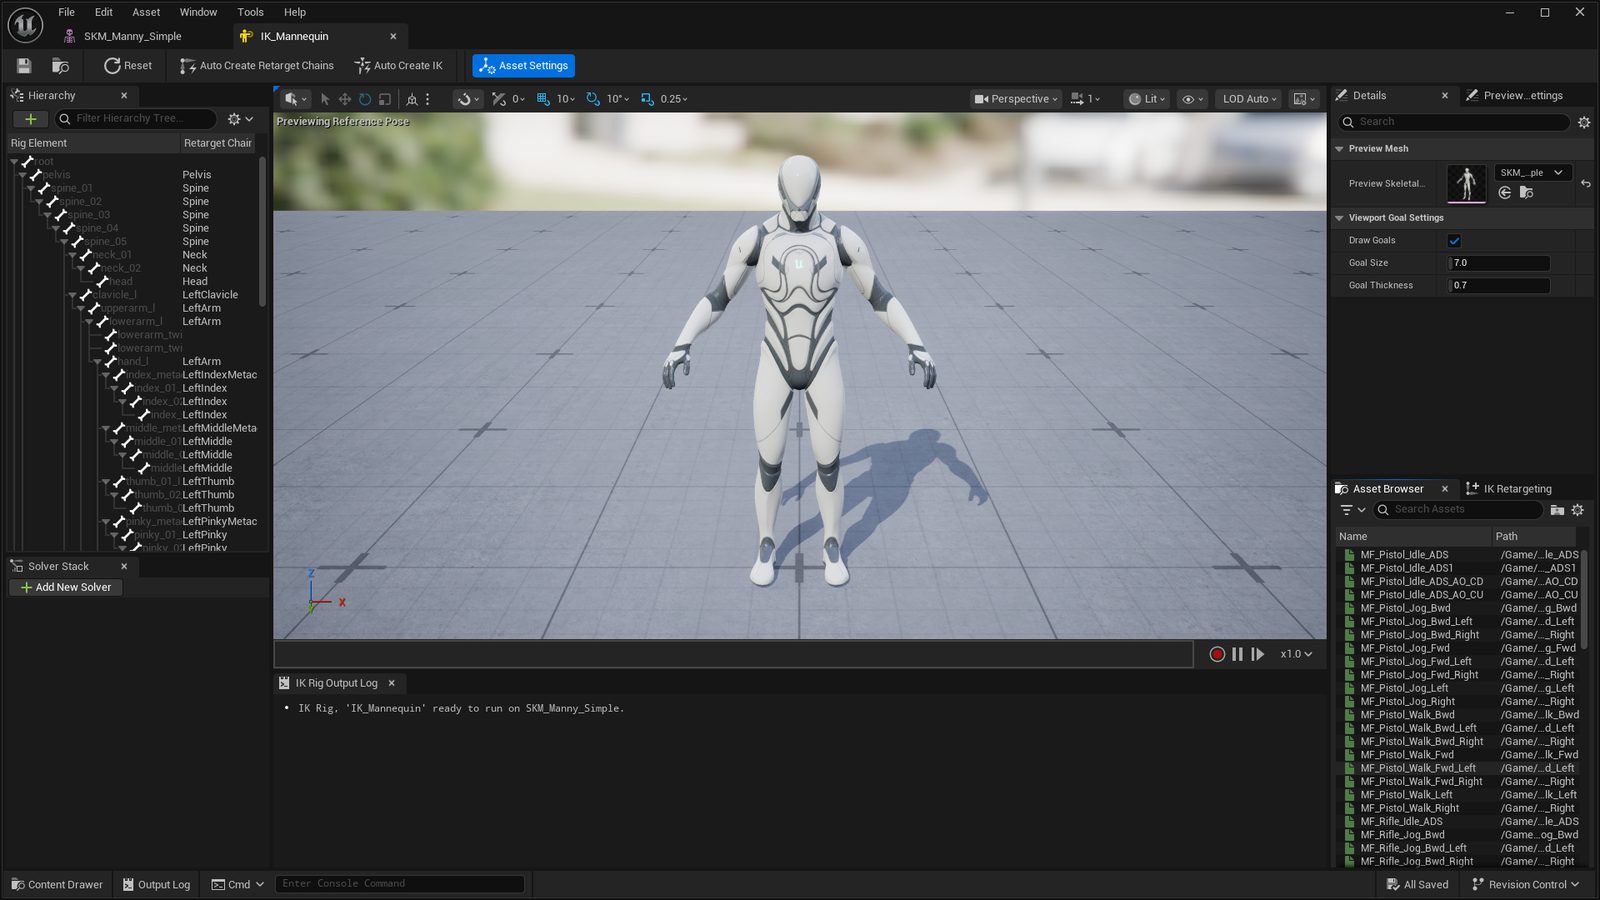
An IK Rig for Manny after Auto Create Retarget Chains: each bone on the left is labelled with its chain, Spine, LeftArm, LeftIndex and so on. - Make an IK Retargeter
Create an IK Retargeter from Manny's IK Rig to the new rig. If the arms are in A pose instead of T pose, fix the retarget pose. Export the animations.
Unreal can paint skin weights, add bones and repair a bad import inside the Skeletal Mesh Editor. Find the weight-paint brush once so you know it exists. Full rigging still belongs in Blender.
- A MetaHuman runs and jumps in the Third Person level using Manny's animations.
- You can say what a control is and what a bone is without looking it up.
- A Blender character imported on its own skeleton and plays a retargeted walk.
Read next
- MetaHuman documentation
- Control Rig
- IK Rig animation retargeting
- Skeletal Mesh Editor
- Game Animation Sample Project — the motion-matching sample worth studying once your own character moves