- Block a walk from four core poses rather than inventing motion frame by frame.
- Read the graph editor as timing, and change how a motion feels by changing spacing alone.
- Build a loop that plays seamlessly, and diagnose the stutter when it does not.
- Say why a walk with weight looks like a body and one without looks like a puppet.
Brief · 15 min Four poses, not forty
The walk is the most analyzed motion in animation, and the analysis produced a shortcut: almost all of a walk lives in four poses. Everything else is interpolation and refinement.
| Pose | What is happening | What to get right |
|---|---|---|
| Contact | Feet apart, both down; the forward heel strikes | Stride length — it sets the character's whole scale and energy |
| Down | Weight drops onto the front foot; hips at their lowest | The drop should be fast. Bodies fall onto a foot |
| Pass | One leg swings past the other | Hips near their highest; the standing leg nearly straight |
| Up | Push-off; the body is lifted and carried forward | The rise is slower than the drop was |
Then contact again on the opposite foot, and it repeats mirrored. Four to six poses for a full walk — not thirty.
Not bad taste. Running out of time. Students spend forty minutes polishing the contact pose until it is beautiful, then have twenty minutes left for the other three and hand in something unfinished.
Block all four roughly before you refine any of them. A complete rough walk can be improved; three-quarters of a lovely one cannot be watched at all.
What this rig gives you, and what it does not
The supplied skeleton is forward kinematics only: there are no IK handles to pin a foot to the floor. You pose a leg from the thigh down — thigh, then calf, then foot — and the foot goes where those rotations put it. For a walk that cycles in place, which is what you are making today and what the game will move around the level, that is exactly enough. Feet drifting a little on the floor is a thing to tune, not a thing that is broken.
Build · 45 min The walk
- Block the four poses
Set your frame range, then key contact, down, pass and up at even intervals. Keep them rough — you are establishing the shape of the motion and will fix everything about them later. Pose from the hips outward: pelvis, spine, thighs, calves, feet; arms last.
The keying loop, exactly
- Click the Animation workspace tab at the top. The viewport is on the left, the Dope Sheet below it. Numpad 0 for the stage camera.
- In the Timeline, set End to 24 — one second, one full cycle at this file's 24 fps.
- Click a bone, Ctrl+Tab → Pose Mode (Day 4). At frame 1, A to select every bone, then I → Location & Rotation. That keys the rest pose as your starting contact.
- Pose the contact: thigh_l forward, thigh_r back, calves bent to suit, pelvis down a touch. A, I again on the same frame — keying replaces.
- Drag the playhead to frame 7, pose down, A, I. Frame 13 pass. Frame 19 up. Frame 25 is contact again, mirrored — next step.
- Spacebar plays. Yellow fields in the N panel mean keyed on this frame; green means keyed elsewhere.
Expect: four columns of diamonds in the Dope Sheet, and a character that lurches between poses when you play — that is blocking, and it is correct.
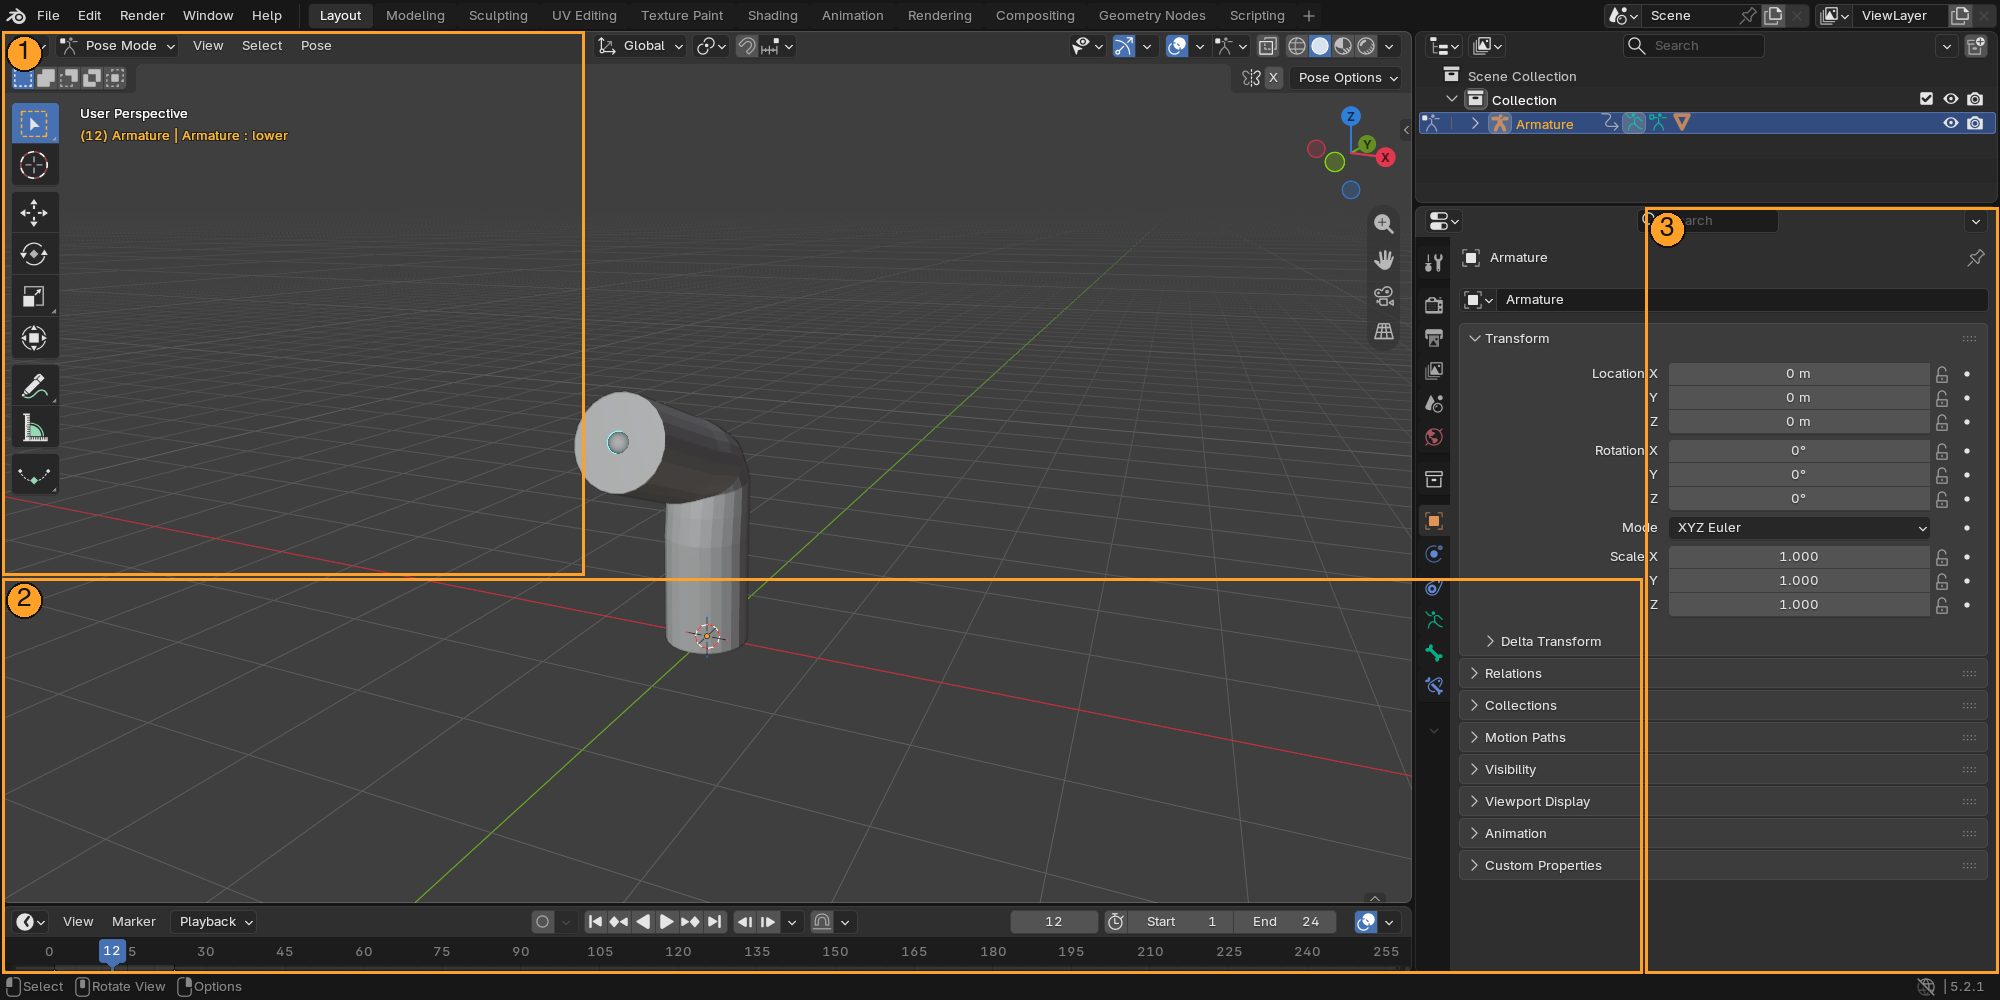
The Animation workspace tab: 1 viewport in Pose mode, 2 Dope Sheet below it, 3 Properties. Work here for Day 5. 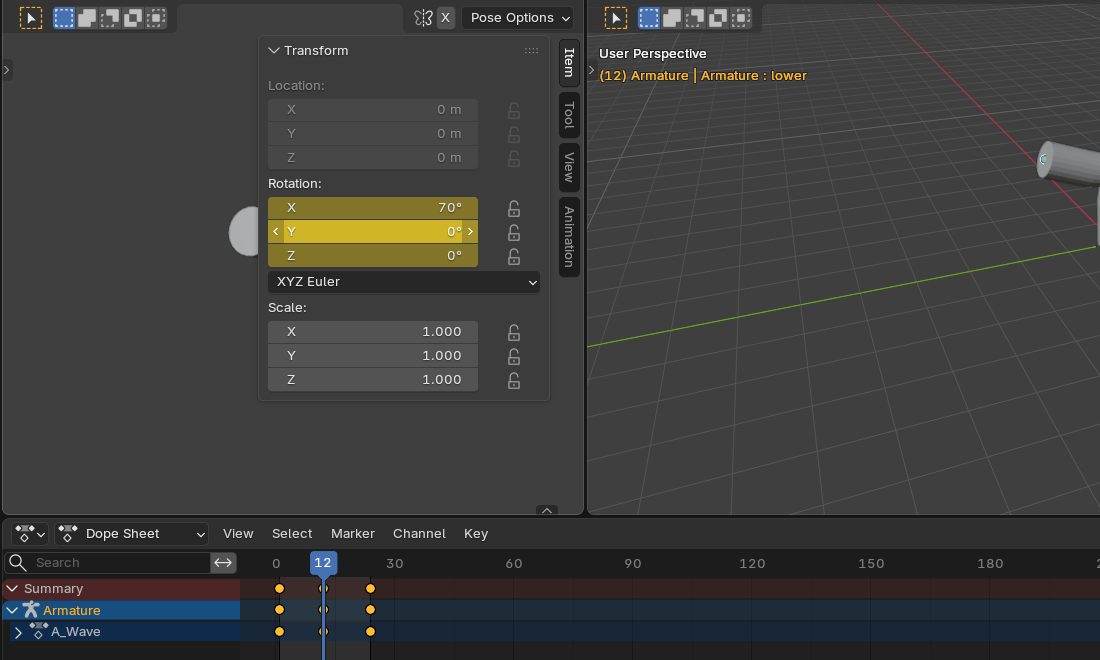
After I on a posed bone: the Rotation fields go yellow in the N panel and a diamond appears on the Dope Sheet at the current frame. Yellow means keyed on this frame; green means keyed elsewhere. - Steal the second half
Copy a pose, then paste it flipped with Ctrl+Shift+V. A symmetrical walk's second half is the first half mirrored, so this is the single biggest time-saver in character animation.
It is also where Day 4's fourth check earns its keep: paste-flipped works entirely by bone name, matching _l to _r. If anyone had renamed a bone, this step would silently do nothing at all.
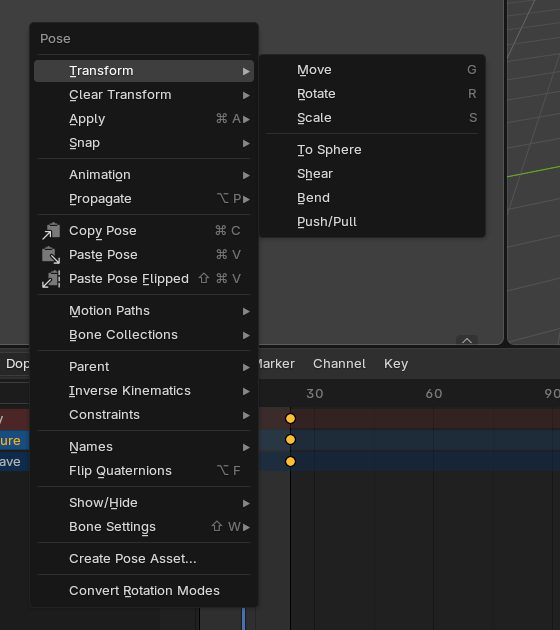
The Pose menu in Pose mode: Copy Pose, Paste Pose, and Paste Pose Flipped — the one that mirrors left and right, provided the bones carry matching left/right names. - Open the graph editor and look at spacing
This is what turns blocking into animation. Every key becomes a curve. The keys' values are the poses; the spacing between them is the timing, and timing is what a viewer actually reads.
Evenly spaced feels robotic, because nothing in a body moves at a constant rate. Bunched at the extremes and spread through the middle feels like mass being accelerated and slowed. Drag a few handles, play it back, and watch the personality change without a single pose changing.
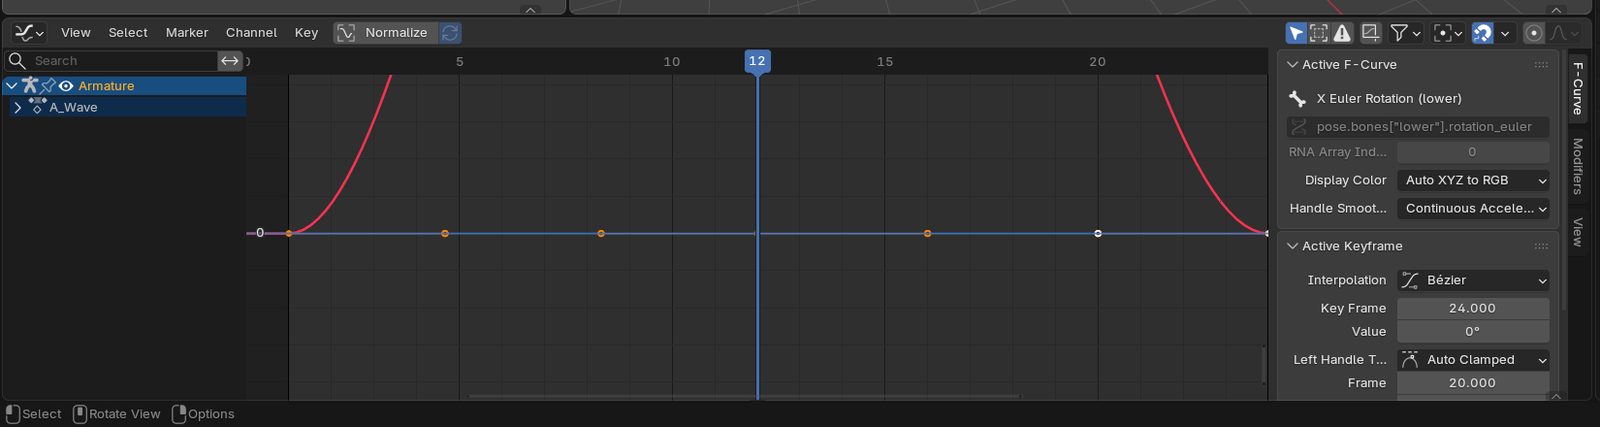
The Graph Editor (change any area's editor type to it, or use the Animation workspace). One rotation channel from 0° to 70° and back. The shape of the curve is the timing. 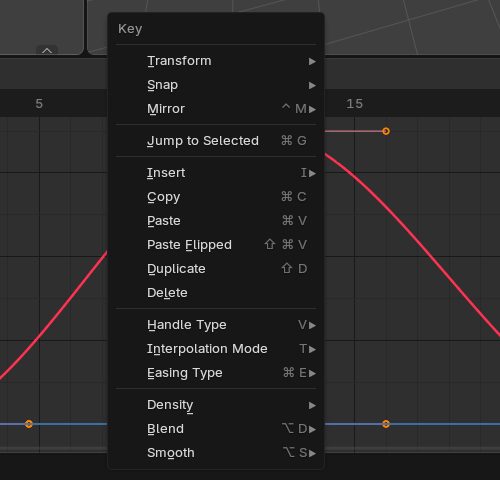
The Key menu in the Graph Editor: Interpolation Mode (T) and Easing Type are how you make a fall hit hard and a rise float. - Make the hips carry the weight
Isolate the pelvis's vertical curve (pelvis, Z Location). It should drop quickly after contact — gravity taking the body onto the foot — and rise more slowly as the leg pushes against it. A smooth even sine wave means your character is floating, and everyone feels it without being able to say why.
- Close the loop properly
First and last frames must be identical. Copy frame 1 to the end of the range, then play one frame short of it. Play the duplicate as well and that pose is held for two frames, which reads as a small hitch every cycle.
- Watch it loop twenty times
Set playback to loop and just watch. Problems invisible in one pass become obvious by the fifth repetition: a foot sliding slightly, a hitch at the seam, an arm out of phase with the legs.
Weight. A body falls onto a foot; it does not float onto it. Almost every student walk is too smooth and too even, because interpolation is smooth and even by default and it takes deliberate effort to break it.
Watch someone cross a room and pay attention only to their hips. The drop is abrupt. The rise is labored. That asymmetry is the whole illusion.
- Four poses blocked, and you blocked all of them before refining any.
- Paste-flipped worked, which means the bone names are intact.
- The pelvis curve drops faster than it rises.
- It loops twenty times with no stutter at the seam and no foot sliding.