- Explain what a weight is, and therefore why a shoulder crumples.
- Find your way around a 65-bone skeleton and say what the hierarchy is for.
- Pose and reset bones in Pose Mode without losing the rest pose.
- Read the weights on a joint in Weight Paint mode, and verify the four properties the engine requires.
Brief · 15 min What a rig actually is
A rig is two things people usually run together: an armature, which is a hierarchy of bones, and skinning, which answers the question "when this bone moves, which vertices come with it, and how much?"
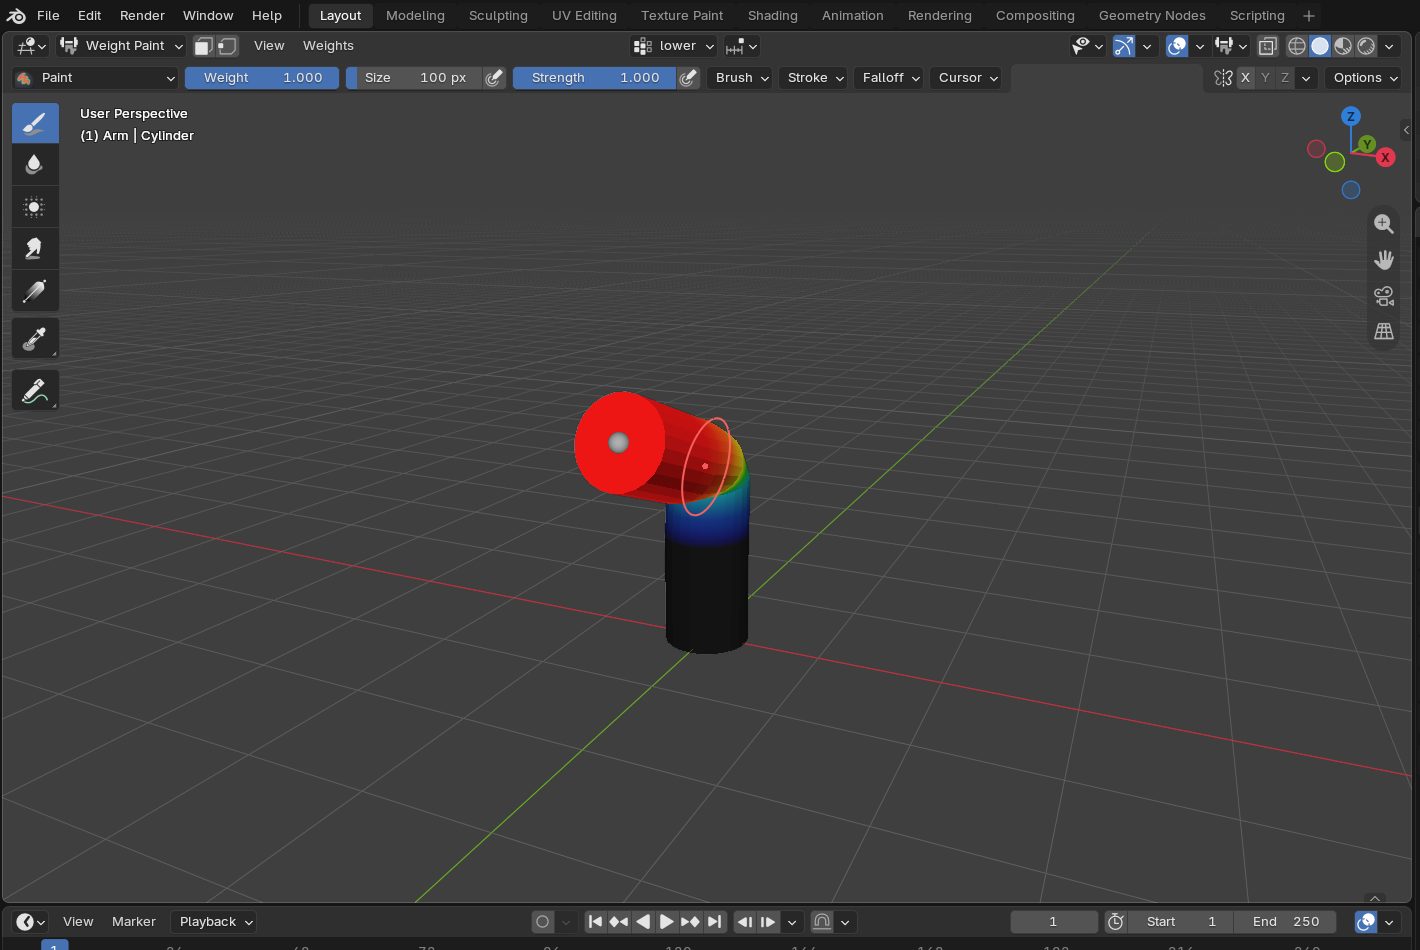
The second part is where all the difficulty lives. Every vertex carries a set of weights — one number per nearby bone, between 0 and 1, adding up to 1 across all the bones influencing it. A vertex weighted 1.0 to the upper arm follows the upper arm exactly. A vertex on the shoulder seam might be 0.5 upper arm and 0.5 chest, so it moves halfway between them and the surface bends smoothly.
So when a shoulder crumples like a paper bag as the arm raises, the geometry is not broken and the bones are not wrong. Those numbers are badly distributed in that spot — too abrupt a handoff from one bone to the next. That is all weight painting means, and knowing it turns painting from guesswork into a fix.
Why you are not building one
Fitting a metarig, generating a control rig and cleaning the weights is a two-day job done properly, and Week 8 needs you animating, not fitting elbows. So the character arrives already bound: a Quaternius Universal Base Character (CC0, free for anything) on a 65-bone skeleton named the way Unreal names its own — pelvis, spine_01, clavicle_l, thigh_r. That naming is what will let it retarget onto Manny and Quinn in Week 10 with almost nothing to fix.
This is also how most productions work: animators inherit rigs, riggers build them. What you must have either way is everything on this page.
Build · 30–45 min Meet the rig, pose it, read it
- Open the stage and look at it lit
Numpad 0 for the camera, Z → Rendered. The bones draw through the body because In Front is already ticked for you (Armature Data tab, the green stick figure → Viewport Display). If bones ever vanish inside a mesh on another file, that is the box.
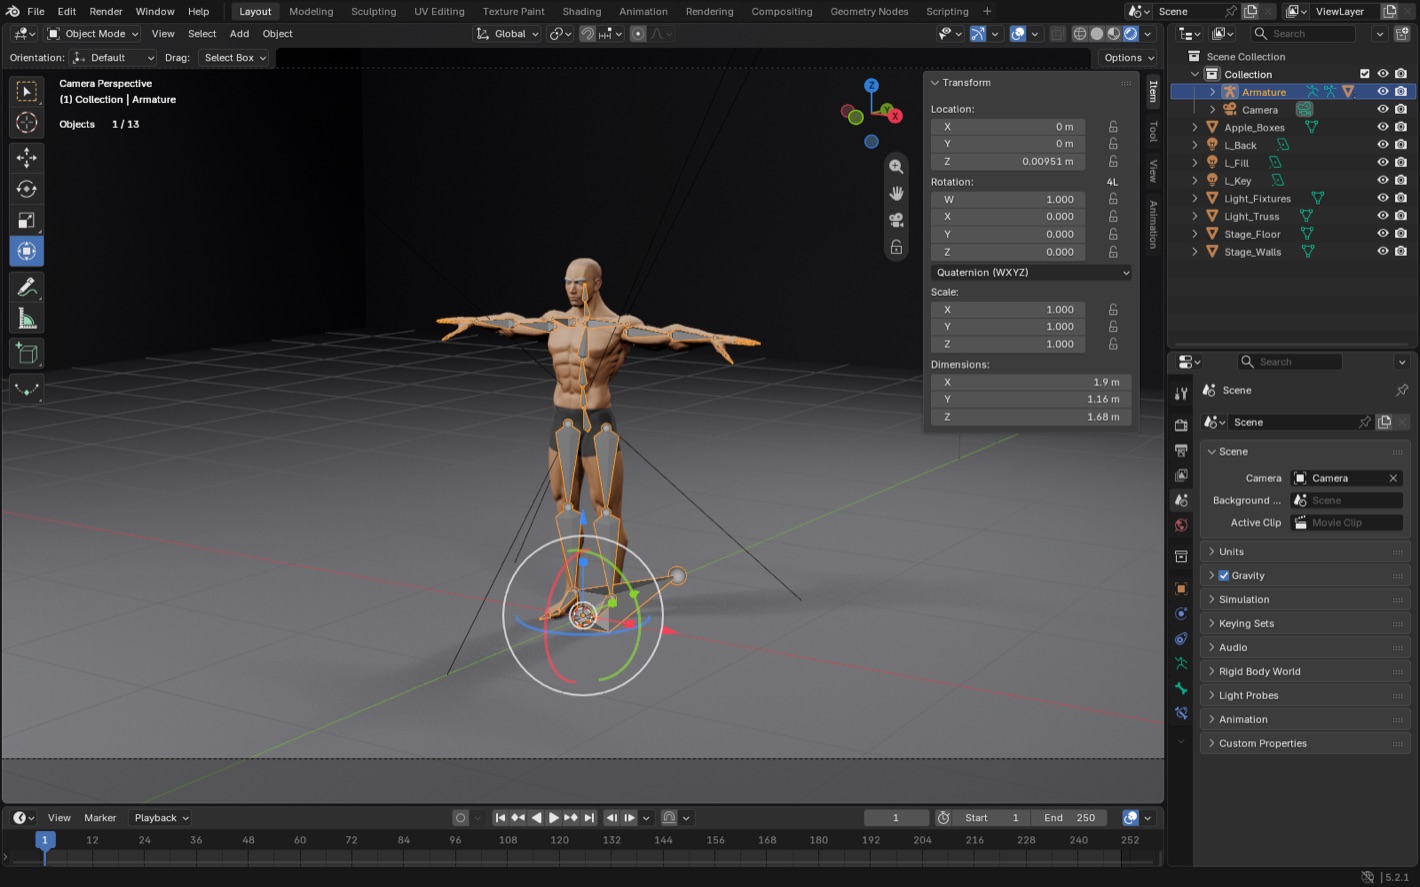
The supplied character through the stage camera, Rendered shading, Armature selected. Key, fill and back lights are already placed; the bones show through the body because In Front is on. - Meet the skeleton
In the Outliner, click the arrow beside Armature, then the arrow beside the green armature data inside it: the bones appear as a tree with root at the top. Read down it once. Everything below a bone follows it — rotate the pelvis and the whole body goes; rotate a hand and only the fingers come.
Chain Bones, top to bottom What it is for Root root Sits at 0, 0, 0 with no geometry on it. The handle Unreal moves the whole character by Body pelvis → spine_01 → spine_02 → spine_03 → neck_01 → Head The line of action. Weight and attitude live here Arm clavicle_l → upperarm_l → lowerarm_l → hand_l → fingers (index_01_l…) Hangs off spine_03. Mirrored as _r Leg thigh_l → calf_l → foot_l → ball_l Hangs off the pelvis. Mirrored as _r. Tomorrow's walk is posed from the thigh down Sixty-five in all, counting the fingertip _leaf bones. Every one of them moves geometry; there is no separate layer of handles — which matters in the checklist below.
- Pose it
Click any bone (or the character; either way the Armature becomes active), then Ctrl+Tab → Pose Mode. Click upperarm_l, press R, then Z, type -60, Enter. The arm swings forward, the elbow and hand come with it, and the shoulder deforms. That is skinning working.
Alt+R resets the rotation of the selected bone. A then Alt+R, Alt+G, Alt+S resets every bone to the rest pose. Learn those four keys today; you will use them more than any others tomorrow.
Getting in, if the mode will not change
- The mode dropdown is at the top-left of the viewport — the one that says Object Mode. Pose Mode is only listed when an armature is the active object.
- If you clicked the body and the list has no Pose Mode, you selected the mesh, not the rig: click a bone instead, or click Armature in the Outliner.
- In Pose Mode the header reads Pose Mode and bones highlight blue when selected. The N panel's Item tab shows the active bone's name and rotation.
Expect: the header says Pose Mode; clicking a bone turns it light blue; R rotates it around its own base.
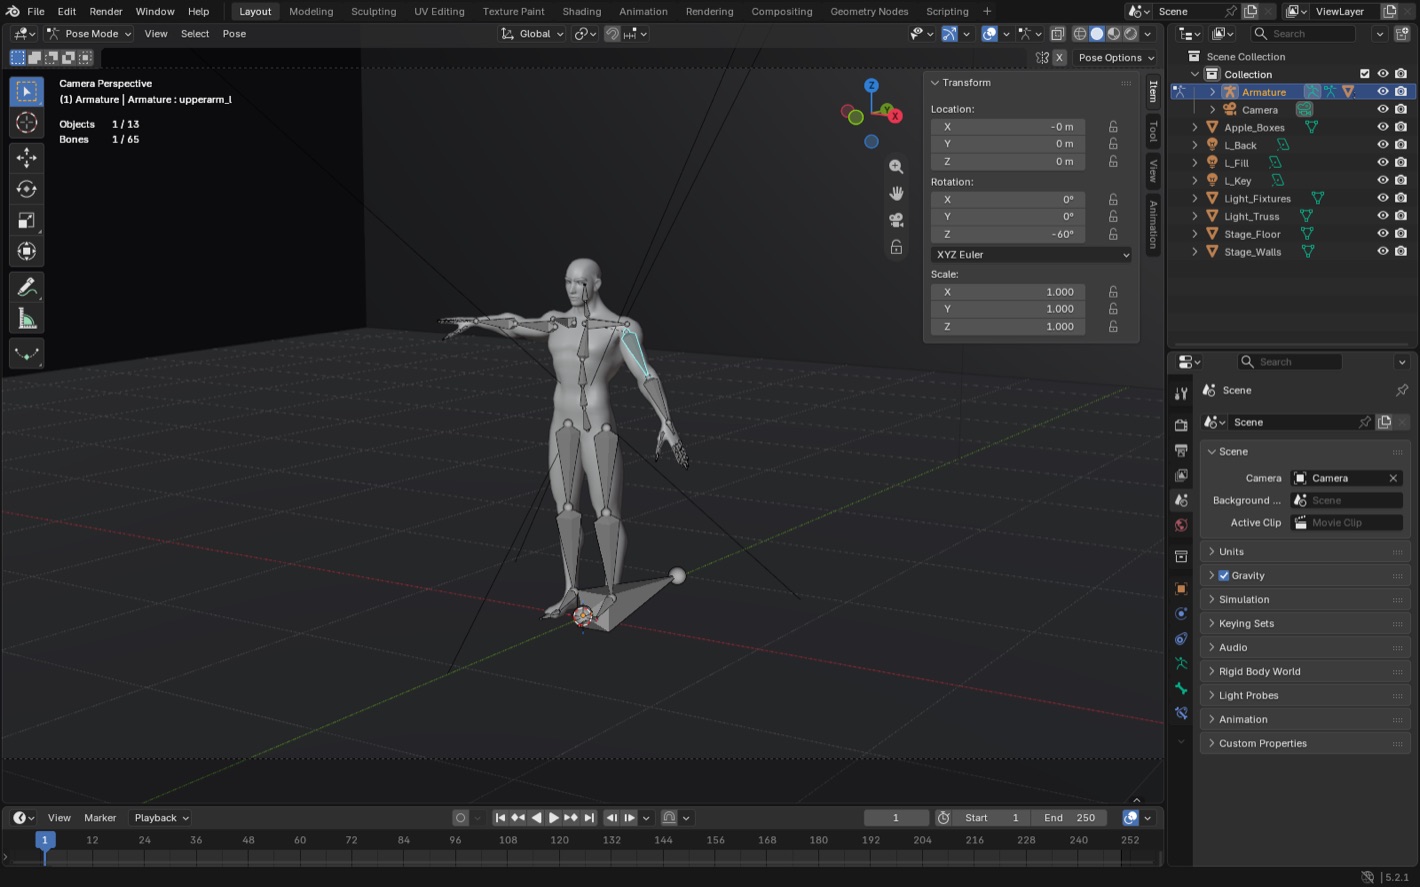
Pose Mode, upperarm_l selected and rotated −60° about Z. The N panel shows the bone's rotation; the elbow, hand and fingers follow because they sit below it in the tree. - Read the weights — do not paint them
Back to Object Mode (Ctrl+Tab again). Click the rig, then Shift-click the body so the mesh is active and the rig is also selected — the order matters. From the mode dropdown choose Weight Paint. Now Ctrl-click any bone: its weights show on the body. Red follows that bone completely, blue not at all.
Ctrl-click upperarm_l and look at the shoulder: a gradient, not a line. Then clavicle_l, then spine_03, and watch the handoff pass across the same vertices. That handoff is what you were reading about in the brief. When you have seen it, go back to Object Mode — you were looking, not changing.
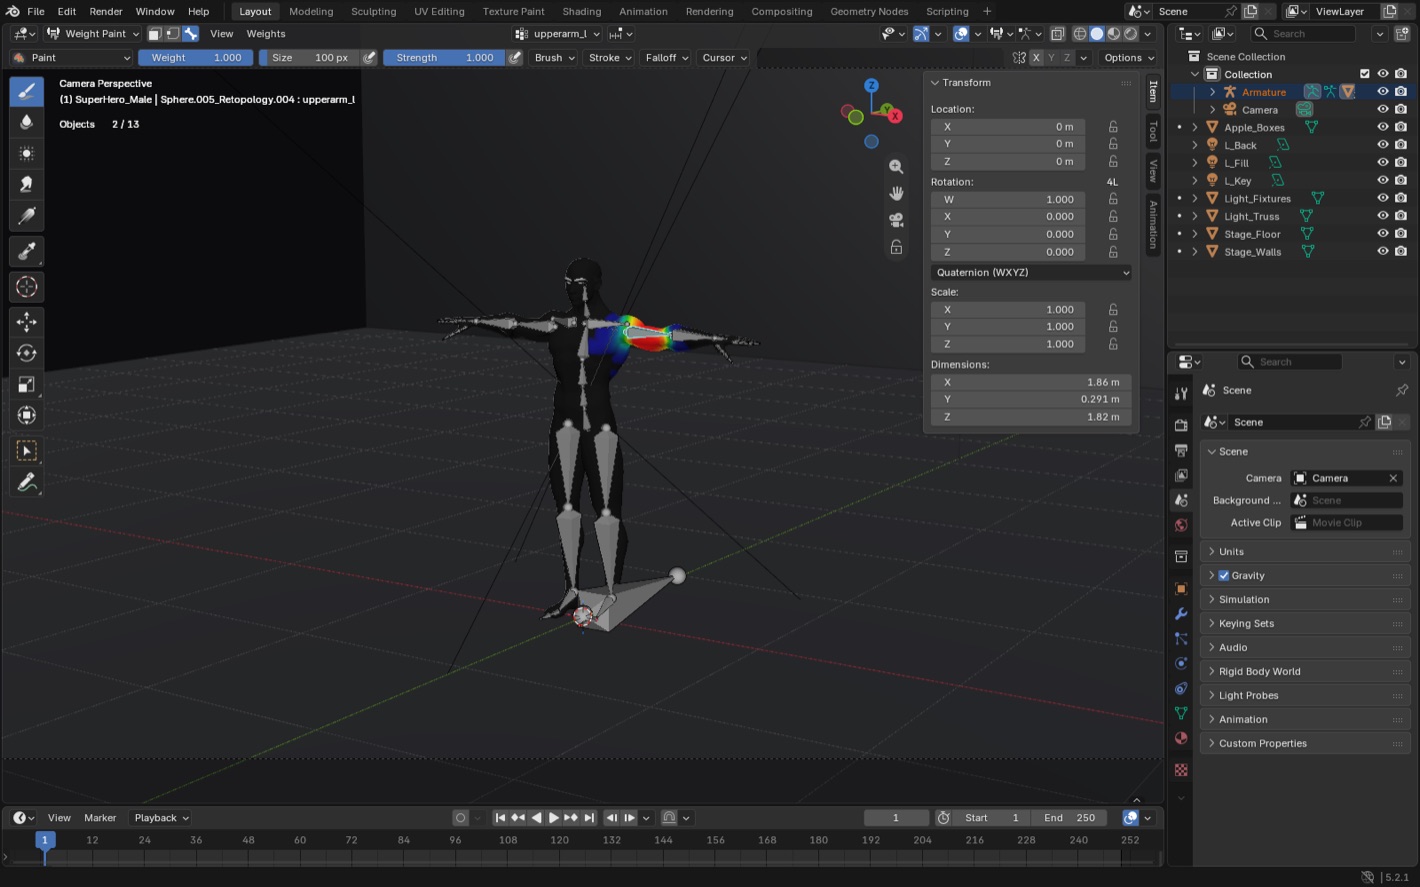
Weight Paint mode on the supplied body with upperarm_l active: red across the upper arm, fading through green and blue at the shoulder and the elbow. The header confirms which mesh and which bone you are looking at. - Push it to the edges
Pose Mode again. Take the arm overhead, a thigh straight forward, and twist spine_02 forty degrees. Watch the shoulders and hips, because that is where every rig goes wrong first: the widest range of motion and the most bones competing for the same vertices. If you find a pinch, you now know exactly what it is — a weights handoff in that spot — and where you would paint. Week 8 shows you the brushes.
- Reset, and save
A, then Alt+R, Alt+G, Alt+S: back to the rest pose, arms out. Object Mode, then File → Save. Tomorrow opens exactly this file, and it needs to open at rest.
Check · the four rules What the engine requires
A rig can be flawless in Blender and still import as a mess. These are the reasons. Each is checkable on the supplied rig in under a minute — and each is what you check on any rig you are ever handed.
- A root bone at the origin, named root
Pose Mode, click root in the Outliner tree, look at the N panel: it sits at 0, 0, 0, and it is separate from the pelvis — not the hips renamed. It is what makes a character move as one thing rather than sliding around inside itself. Present.
- Deform bones only
Rigify-style rigs make control bones — the handles you grab — and DEF- bones that actually move the mesh; the engine wants only the second kind, and exporting the lot gives you a skeleton stuffed with bones you did not make. This rig has no control layer: all 65 bones deform, so there is nothing to filter out at export. If you are ever handed a Rigify rig, this is the check that bites.
- Applied transforms on the armature
Object Mode, click Armature: Scale 1.000, 1.000, 1.000, Rotation 0. Present. Day 1, and this is where it matters most: unapplied scale on an armature gives you animation that is correct in Blender and wrong in Unreal, with nothing visibly wrong to point at. If you ever scale this character, Ctrl+A → All Transforms before anything else.
- Symmetry naming, intact
This rig uses _l / _r suffixes — Unreal's convention — rather than Blender's .L / .R. Blender's mirror tools understand both, so paste-flipped and X-mirror work; renaming a bone to something tidier breaks them silently, with no error. Do not rename anything. Tomorrow depends on this.
One wrinkle to know about and leave alone: the head bone is Head, capitalized, where Unreal's own skeleton says head. It only matters for retargeting, and only if that misbehaves in Week 10.
Before you move on, explain out loud what a weight is and why a shoulder crumples when the weights are wrong. Then name the four checks without looking. If either comes out vague, that is the part to reread — everything tomorrow assumes you understand the rig underneath it.
- You can read the bone tree and say what follows what.
- You posed the arm, watched the shoulder deform, and reset it with the four keys.
- You saw the weight gradient at the shoulder in Weight Paint mode and went back out without painting.
- You verified all four checks on this rig, and the file is saved at rest.