- Build a main menu that opens the game and a pause menu that stops it.
- Bind a slider and a combo box to Game User Settings and save them.
- Switch input modes correctly so the character keeps moving after a menu closes.
- Put a working menu on an object in the world.
Brief · 5 min Three menus, three lessons
| Menu | Opened from | Teaches |
|---|---|---|
| Main menu | Its own empty level, MainMenu, set as the Game Default Map | Create Widget, Add to Viewport, Set Input Mode UI Only, Open Level |
| Pause menu | Escape key in the gameplay level | Set Game Paused, Set Input Mode Game and UI, Remove from Parent, toggling |
| Settings | A button on either menu | Sliders and combo boxes bound to Game User Settings, Apply Settings, Save |
Build · 25 min Main, pause, settings
- Lay out the main menu
Create a Widget Blueprint WBP_MainMenu. Drop in a Canvas Panel, then a Vertical Box anchored to the center. Add a Text Block for the title and three Buttons, each with a Text Block child: Play, Settings, Quit. Set the buttons to 300 by 60 and give them a hover tint so you can see focus change.
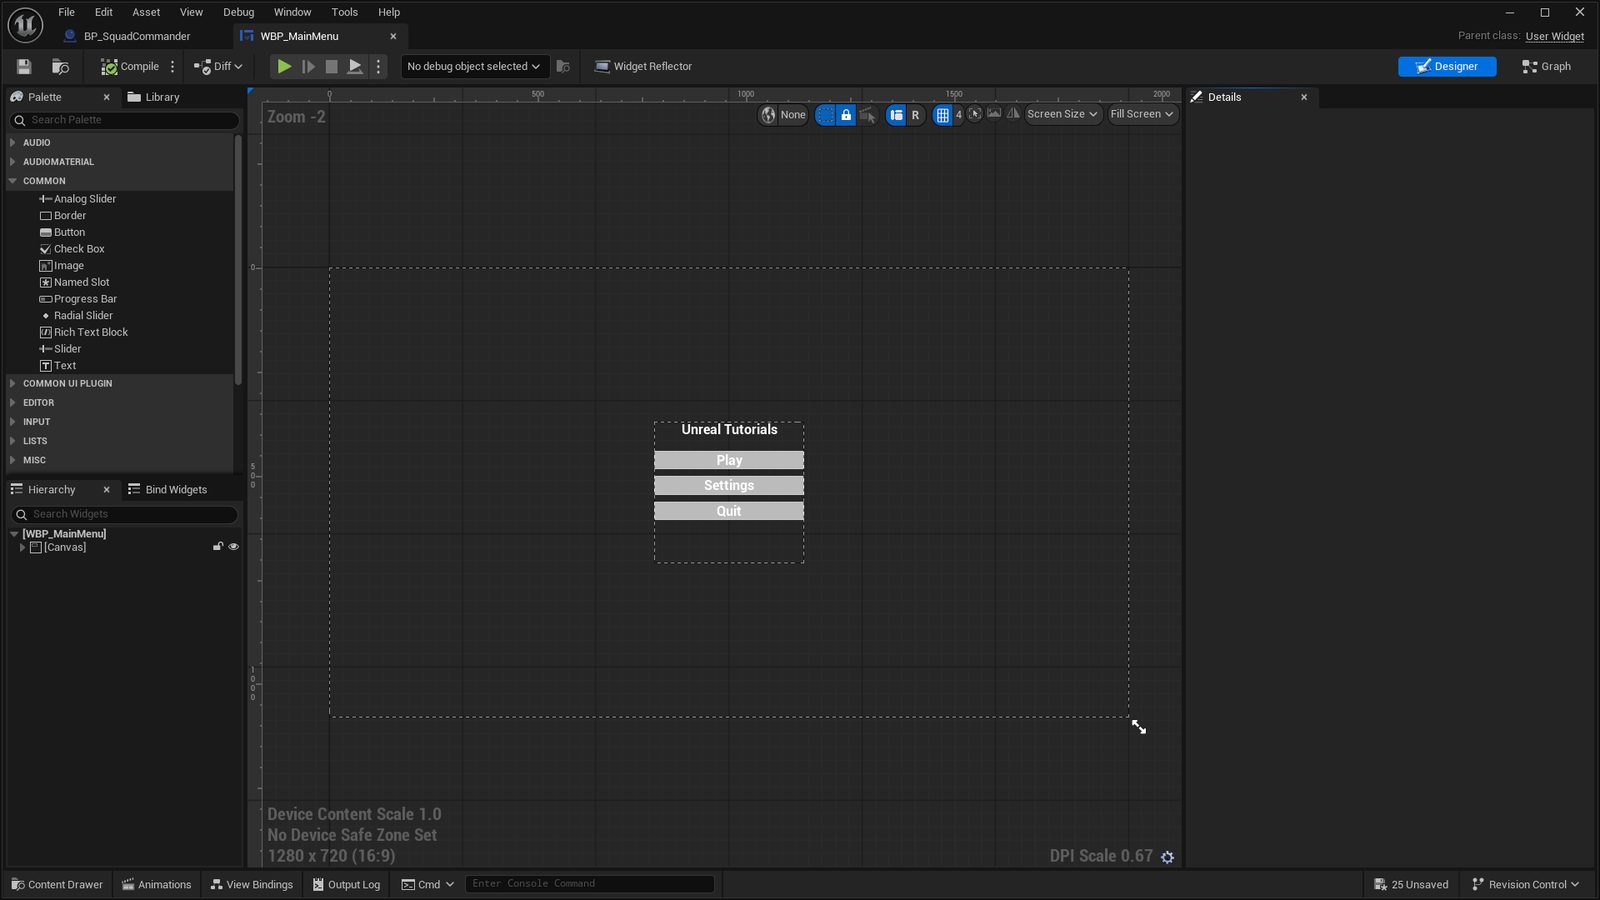
WBP_MainMenu in the Designer: a Canvas Panel, a Vertical Box anchored to the centre, a title and the Play, Settings and Quit buttons. - Wire the buttons
Select the Play button, scroll to Events in the Details panel, click the plus beside On Clicked. In the graph, call Open Level by Name with the gameplay level's name. Quit calls Quit Game. Settings calls Create Widget on WBP_Settings and Add to Viewport, then Remove from Parent on self.
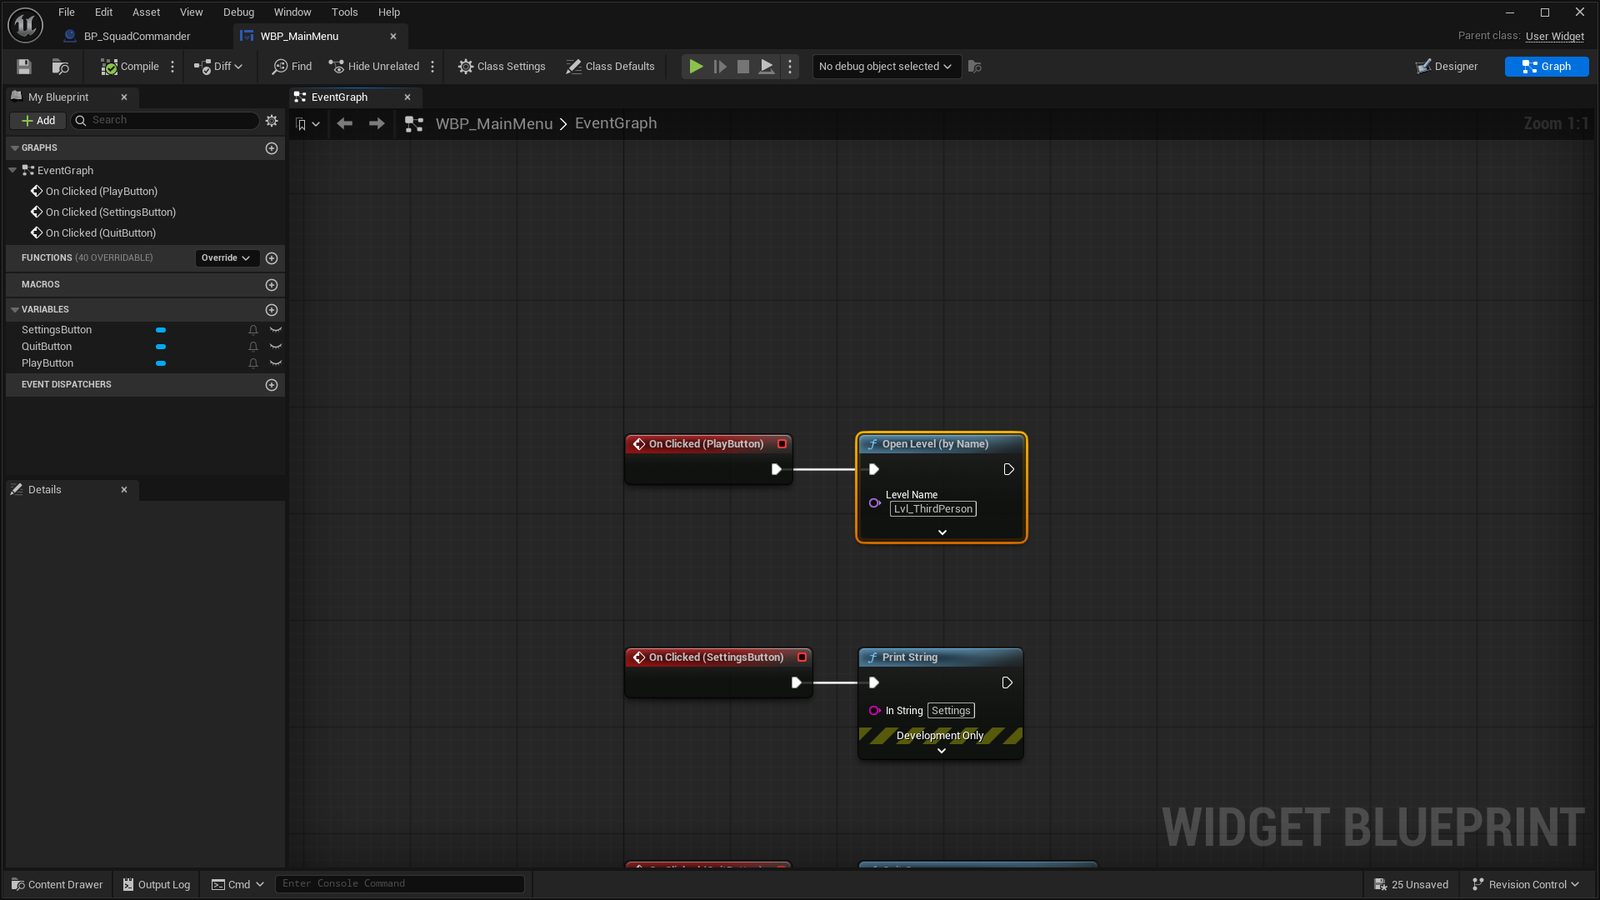
The widget's Graph. Each On Clicked event came from the plus button in the Details panel; Play is wired to Open Level by Name. - Show it on start
Create a blueprint PC_Menu from Player Controller. On Begin Play: Create Widget WBP_MainMenu, Add to Viewport, Set Input Mode UI Only, Set Show Mouse Cursor true. Create a Game Mode blueprint GM_Menu that uses PC_Menu and an empty Default Pawn. In the MainMenu level's World Settings pick GM_Menu, and in Project Settings set Game Default Map to MainMenu.
- Build the pause menu
Create WBP_Pause with Resume, Settings and Main Menu buttons. In the gameplay Player Controller, add an Enhanced Input action IA_Pause bound to Escape. On Triggered: if the pause widget is not valid, create it, Add to Viewport, Set Game Paused true, Set Input Mode Game and UI, show the cursor. Resume reverses all four and clears the reference. On IA_Pause set Execute when Paused to true, or the Escape key dies the moment the game pauses.
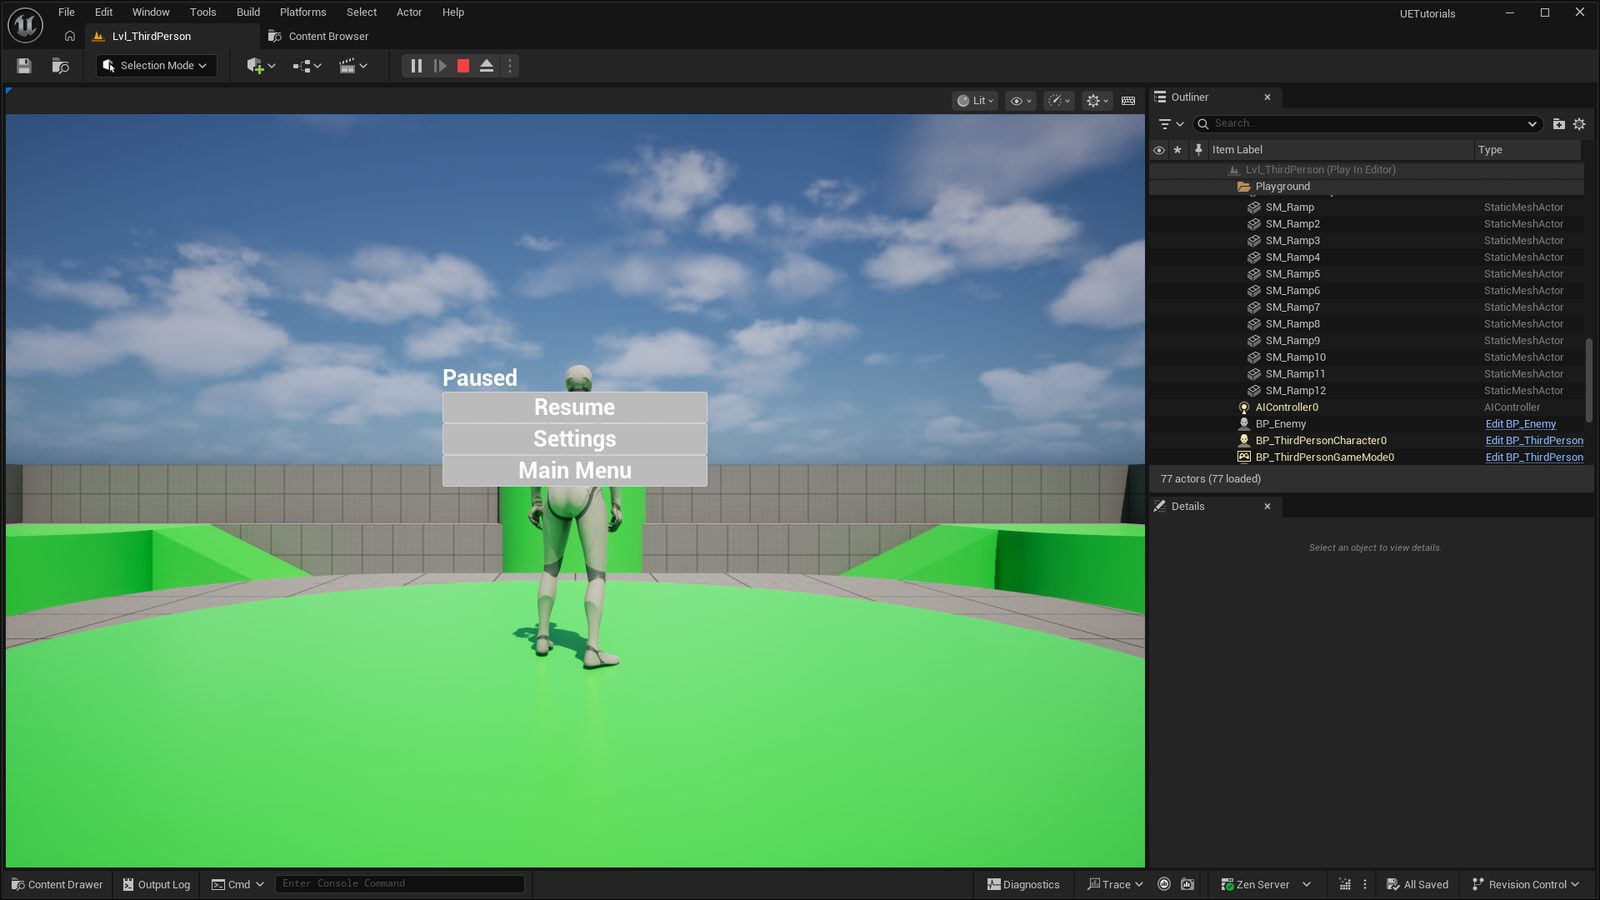
WBP_Pause over the paused game in Play-in-Editor. - Build settings
Create WBP_Settings. Add a Slider for master volume, a Combo Box (String) for resolution, and a Check Box for fullscreen. On Value Changed of the slider, set a Sound Class volume. On the combo box, call Get Game User Settings, Set Screen Resolution, Apply Settings, then Save Settings. Fill the combo box on Construct from Get Supported Fullscreen Resolutions.
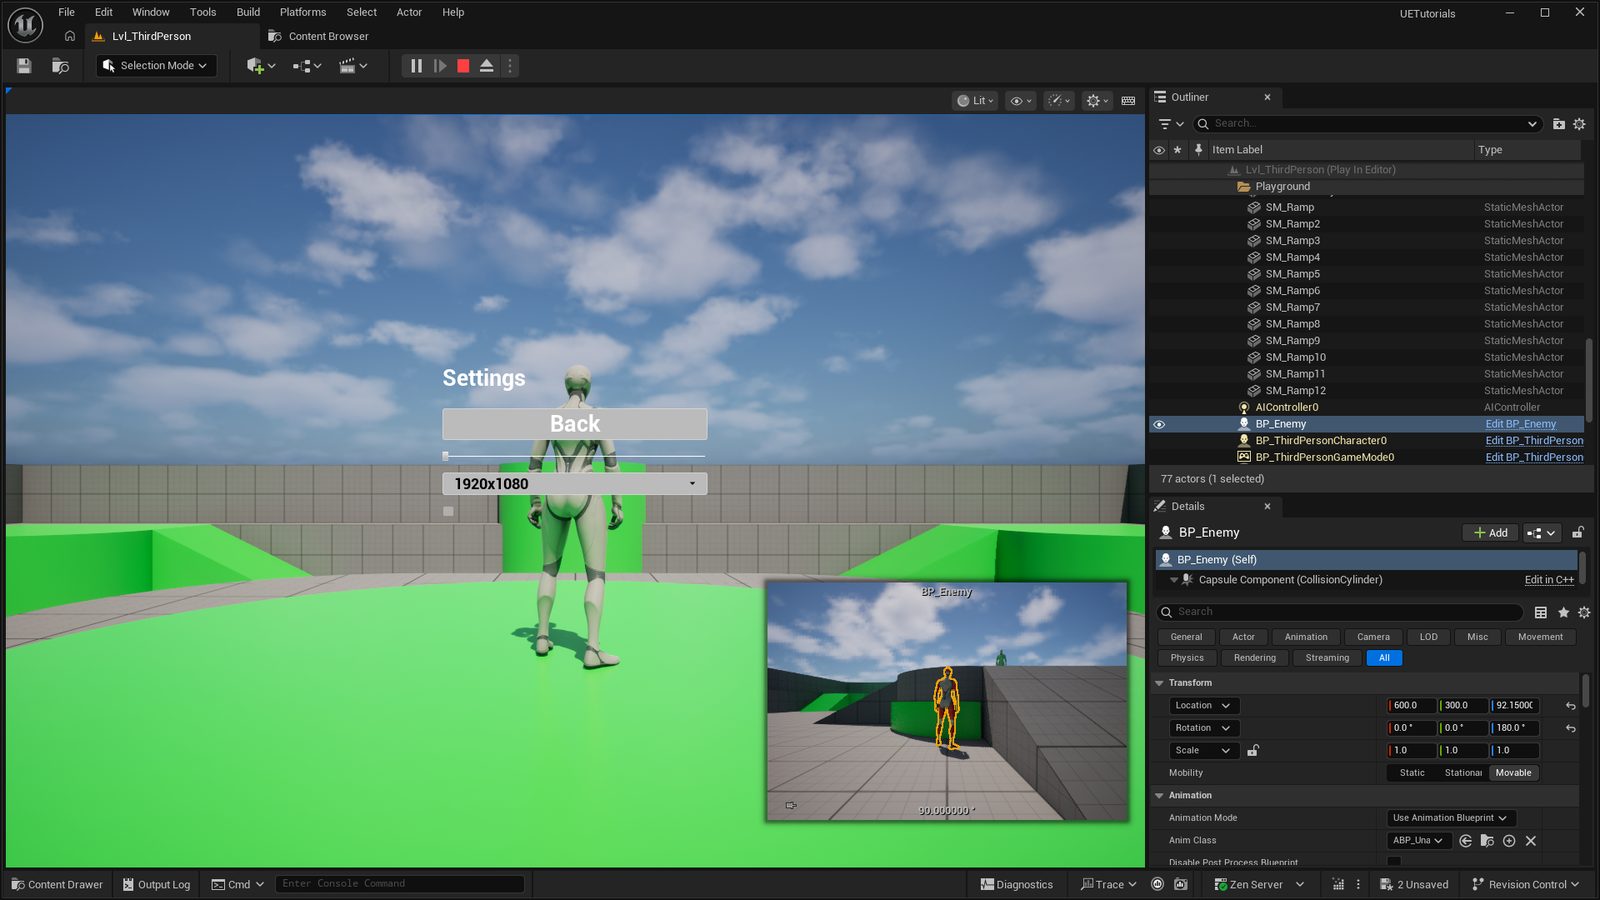
WBP_Settings in Play-in-Editor: the volume slider, the resolution combo box and the fullscreen check box. - Test it like a build
Press Play from the MainMenu level with Standalone Game selected, so the Game Default Map and resolution changes behave as they will in a packaged build.
Build · 10 min Habits worth keeping
- Name widgets with the WBP_ prefix and tick Is Variable only for the ones the graph touches.
- Use a Widget Switcher to flip between Main, Settings and Credits panels inside one widget instead of spawning three.
- Put reusable buttons in their own widget WBP_MenuButton with an exposed Text variable and a custom On Pressed Event Dispatcher. One style change then updates every menu.
- Set Input Mode back to Game Only every time a menu closes, or the character stops moving and you will think the game broke.
- For gamepad and keyboard navigation, enable the Common UI plugin and derive the root widget from Common Activatable Widget. Look at it now; build on it later.
A menu that floats over a vending machine or a door panel is the same widget placed in a Widget Component on the actor, with Space set to World and Receive Hardware Input on. Point a Widget Interaction component from the character's camera at it, and clicks pass through to the buttons. Five minutes once the pause menu exists.
- The game opens on your main menu, Play loads the level, Escape pauses and resumes it.
- Change the resolution in Settings, quit, reopen, and it stayed changed.
- After closing any menu the character still walks.